Learn how to set up GMiner for efficient mining of the Kaspa cryptocurrency (kHeavyHash algorithm) on Windows and Linux. This detailed guide covers choosing a wallet, connecting to a mining pool, overclocking optimization, and even dual mining with Kaspa and ZIL. Increase your hashrate and mine Kaspa with maximum profits!
An unexpected start: the noise of fans and new hope
It’s nighttime, and all around you is the steady hum of video cards revving up their fans. You stare at the screen and wonder: is there really a coin worth mining after Ethereum’s transition to PoS? It seems so. A bold newcomer has taken the place of the giant: Kaspa (KAS) . This coin burst onto the scene like a breath of fresh air for miners left behind.
Kaspa launched at the end of 2021 and immediately attracted attention with its unusual approach. Instead of a traditional blockchain, it uses BlockDAG —blocks are minted in parallel, each in literally one second . Transactions fly by, as if in a fast dance. The mining algorithm is the mysterious kHeavyHash . What is this beast? Simply put, it’s a modification of HeavyHash, optimized for modern hardware. It’s energy-efficient, but demanding on the GPU core (memory is almost unaffected). Don’t be surprised: an overclocked GPU is more important here than super-fast video memory.
Why bother mining Kaspa? Well, firstly, it’s the fastest PoW network to date. Secondly, there are no premines or hidden emissions—the project was launched honestly, without handing out coins to “inner circles.” And thirdly, after the demise of Ethereum, many were looking for a new safe haven, and Kaspa became it. Analysts note that Kaspa is specifically designed for miners with GPUs, and with the right hardware selection, breakeven can occur in as little as 8-12 months . In the mining world, that’s almost instantaneous—like catching a lucky break! Of course, a lot depends on electricity prices and the coin’s exchange rate, but the chances are definitely there.
Another important factor is that Kaspa’s block reward gradually decreases by approximately 5% every month . In other words, the sooner you start mining, the more coins you’ll have time to mine before the next “reward reduction.” Network difficulty is also increasing daily, so solo mining has quickly become an option—everyone is turning to pools for a stable income. But let’s not get ahead of ourselves.
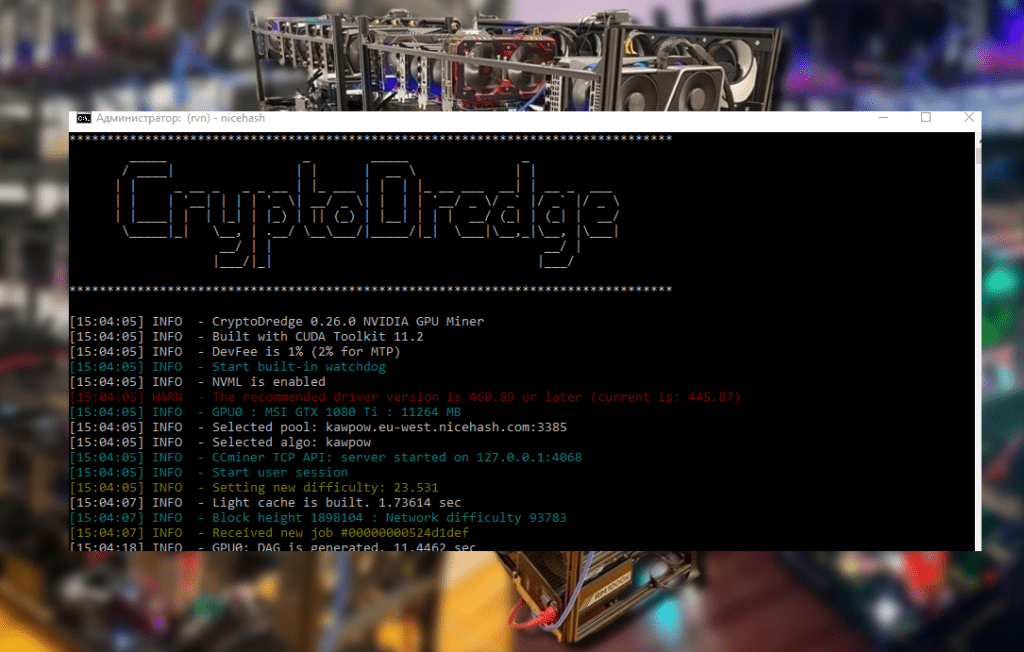
In short, the stars aligned: Kaspa has promise, and GMiner is just the tool to help you catch the last train. GMiner has long earned respect as a reliable and fast miner for NVIDIA and AMD. Support for multiple algorithms, including our kHeavyHash, only confirms its status. The developers clearly haven’t been idle: GMiner updates quickly added compatibility with Kaspa and even improved performance on this algorithm. For example, release 3.20 significantly boosted Kaspa mining speed on older GTX 10-series cards (according to Cool-Mining.org, the hashrate increase reached +5% ). And DevFee on Kaspa is only 1% —a small, but still pleasant improvement.
Ready to get started? Then let’s explore how to integrate GMiner with Kaspa. It’s straightforward, straightforward, and includes a few life hacks from seasoned experts.
Preparation: Kaspa wallet and pool selection 🖧
Before turning on your miner, you need to set up the foundation— a wallet for your KAS and a connection to a reputable mining pool. This is essential: the coins you mine need to be transferred somewhere, and you can’t mine alone these days.
Let’s create a wallet. The easiest way is to use the official Kaspa web wallet . Go to and create a new wallet in just a minute: create a strong password and be sure to save the 12-word seed phrase . Yes, write it down on a piece of paper and put it in a safe place (preferably out of reach of cats and prying eyes). Without this phrase, you won’t be able to restore access to your KAS, so keep that in mind. Crypto-Wallets.org rightly emphasizes: key security is sacred; it’s better to be safe than sorry. The wallet itself, by the way, is very convenient and intuitive, with no unnecessary features. noted in its review that Kaspa Wallet is simple and reliable, which is especially important for beginners. In addition to the web version, there’s also the KDX desktop wallet (a full-fledged network node). It downloads the entire blockchain, but operates autonomously and is considered the most secure. But the web wallet is enough to get started: you’ll get an address, and that’s all you need.
Choosing a pool. The next step is to find a reputable mining pool for Kaspa . Fortunately, there are plenty of them. WoolyPooly is considered the largest—many start with it, as it’s a tried-and-true option. But there are other worthy options: ACC Pool , HashPool , and a number of smaller communities. Basically, any pool will provide you with a stable stream of shares and payouts; the only differences are the fees (usually 1-2%) and, possibly, the server location. Choose a pool close to you (ping is crucial), and you won’t need to register—a wallet address is enough. For example, WoolyPooly allows you to mine Kaspa without an account: just connect and you’re done. We’ll use it for the example below.
A little advice: check the pool statistics—if one pool controls too much of the network, it might be worth switching to a smaller pool to support decentralization. And, of course, read recent reviews—maybe there are any payout issues? Miner intuition and instinct are still important.
Installing GMiner: Quick and Hassle-Free
Now that we’ve decided on a wallet and pool, it’s time to download the miner software itself. GMiner is available for free, and the latest version is best downloaded from the developers’ official GitHub repository or from trusted websites (for example, and Cool-Mining.org regularly publish links to new releases). Choose the version for your operating system: there are builds for Windows (.zip archive) and Linux (.tar.gz archive). The miner is lightweight and loads in seconds.
- GitHub: https://github.com/develsoftware/gminerrelease/releases
After downloading, unzip the archive to a convenient folder. Make sure all the necessary DLLs and other files are located next to the miner.exe executable file (on Windows)—this is usually the case. No installation is required; the miner is ready to use right away.
On Windows , you may need to add an exception to Windows Defender SmartScreen or your antivirus—mining software isn’t always trusted, and rightly so. If you downloaded it from an official source, everything is fine. Just allow it to run.
On Linux , don’t forget to make the file executable: chmod +x minerplacing it in the miner’s folder solves the issue. It’s also recommended to run the miner from the terminal to see the output. Some prefer to use screen or run it through nohupfor continuous background operation, but this is optional.
Now the most interesting part is setting up launch parameters .
Setting up GMiner for Kaspa (Windows) 💻
In Windows, setup is done via a .bat file . If you’re a seasoned miner, you’ll know the drill. For beginners, a .bat file is a simple text file containing the miner launch command and the required parameters. Windows treats it as a script and executes it when double-clicked.
Open Notepad (or Notepad++, whichever you prefer) and create a file, say, mine_kaspa.bat. Write just one long line inside:
miner.exe --algo kheavyhash --server pool.eu.woolypooly.com:3112 --user <ВАШ_KAS_АДРЕС>.<ИМЯ_РИГА> --pass x
Let’s solve this puzzle:
- miner.exe is the program name (executable file). There are no changes here.
- –algo heavyhash — specify the algorithm. For Kaspa, this is kHeavyHash (the case isn’t an error; you can use lowercase letters).
- –server — the pool address and port. In the example:
pool.eu.woolypooly.com:3112(the European WoolyPooly server). Your pool will have its own address and port, so substitute them. - –user —the most important part here: your Kaspa wallet address . This is where your rewards will be sent. Immediately after the address, you can enter your rig’s name (worker name) separated by a period—any word in Latin. For example:
KP1q...XYZ.myPC(instead of KP1q…XYZ, enter your long address string). - –pass x — the pool password, usually not required. Many pools ask for a simple password
xor leave it blank. We’ll include it herexfor compatibility purposes.
Save the file, make sure the extension is .csv .bat(and not .csv .txt), and double-click it. A console window should open and some text should appear—the miner has started and is connecting to the pool.
If you’ve done everything correctly, in a couple of seconds you’ll see the first lines: GMiner version, a list of your GPUs, connection to the pool, and then the hashing process begins . The hashrate on each card and the accepted shares are music to the miner’s ears. 🎵
What should you do if the window closes immediately or an error occurs? Don’t panic:
- Check that the pool address and port are specified correctly. A single extra space or typo will prevent the system from working.
- Make sure your miner.exe file is in the same folder where you run the batch file. If not, specify the full path or move the batch file to the miner folder.
- Check the error log if you have time—GMiner often gives you hints about the problem (for example, an unsupported algorithm or an invalid address).
- Update your graphics card drivers. Seriously, old drivers sometimes don’t work well with new algorithms. Nvidia and AMD regularly release updates with optimizations, including for mining.
Once the miner is running successfully, it’s worth observing it for a while. After a minute or two, you can check the pool’s website to see if your worker has appeared and share statistics. Usually, just paste the wallet address into the search bar on the pool’s website, and you’ll see your progress.
Setting up GMiner for Kaspa (Linux) 🐧
On Linux, the process is similar, except instead of a batch file, you’ll use a shell script . Create a file, for example mine_kaspa.sh, and place the launch command there:
#!/bin/bash
./miner --algo kheavyhash --server pool.eu.woolypooly.com:3112 --user <ВАШ_KAS_АДРЕС>.<ИМЯ_РИГА> --pass x
Save, then grant execution permissions: chmod +x mine_kaspa.sh. Run the command ./mine_kaspa.shfrom the terminal. You’ll see the same miner output as in Windows, only in your favorite console. 💫
All the details remain the same: don’t forget to replace the wallet address and other parameters with your own. If you’re using a different pool, substitute its address. Linux miners should also ensure that the Nvidia CUDA or AMD OpenCL drivers are installed, otherwise the miner won’t detect the graphics card. Specialized mining distributions (HiveOS, RaveOS) usually have everything already configured, but if you’re using pure Ubuntu or another distribution, take care of this.
By the way, GMiner also supports failover pools —you can specify several --serverin a row, and if the primary pool fails, the miner will automatically switch to the backup pool. This is useful for emergency situations, but not necessary for everyday mining.
Overclocking and Undervolting: Getting the Most Out of Your Performance ⚡
Now that GMiner is running, it’s time to optimize overclocking and power consumption . Remember how we mentioned that the kHeavyHash algorithm prefers high core clocks and uses very little memory? It’s time to put that knowledge to good use.
Core overclocking. For Kaspa, it’s crucial to give the GPU core a good frequency. While we’re used to throttling the GPU on Ethereum, barely running at 1200 MHz, that won’t work here. Feel free to increase the core clock: many Nvidia RTX 30-series GPUs are set to 1500–1800 MHz (within reason, of course, without going overboard). This will provide a significant boost to your hashrate.
Memory is on a leash. But video memory can and should be slowed down. Yes, yes, we usually chase megahashes by overclocking memory for Ethereum, but Kaspa changes the game. We reduce the memory clock to the minimum stable value. For example, on Nvidia, many people set memory to 5000–5200 MHz or even lower (in MSI Afterburner terms, this is -500 or -1000 MHz below stock, or using the so-called “bug lock” of 810 MHz for GDDR6). This will reduce memory temperature and overall power consumption, while the hashrate will be almost unaffected. Beautiful!
Undervolting is the Kaspa miner’s best friend. By increasing the core clock, we don’t want the card to overextend itself. The solution: limit the voltage or power limit. There are several approaches:
- On Windows, the easiest way is to use MSI Afterburner: set the Power Limit to, say, 70-80%. Or use the Curve Editor to set the desired voltage (for example, 750-800 mV) at the target core clock.
- GMiner has convenient command line options:
--lock_cclock,--lock_mclockand--lock_voltage. They allow you to lock the core clock, memory clock, and voltage directly from the miner (this works primarily on Nvidia cards). For example, we can run GMiner with the parameters--lock_cclock 1700 --lock_mclock 810 --lock_voltage 800, and the miner will automatically lock the core at ~1700 MHz, memory at 810 MHz, and voltage at around 0.8 V. It’s like a built-in wizard. Many miners report that these values provide excellent efficiency for the RTX 3070: the card produces a consistently high hashrate while consuming less than 100 W! - On Linux, undervolting is often done through a utility
nvidia-smi(for Nvidia) or AMD system settings – there you can lower the power limit in watts.
Every card is unique, so adjust your settings individually . Play with the frequencies: if the system becomes unstable or the hashrate drops when you reduce the voltage, increase the mV slightly. If the core allows for a bit more frequency without a proportional increase in power consumption, try adding +50 MHz. Conversely, if the card is overheating, reduce the power consumption. The goal is to find the sweet spot where the hashrate per watt is maximized.
The result of proper overclocking is power savings and cooler chips, which is especially important if you have a whole rig. Kaspa itself requires slightly more power than Ethereum, but proper undervolting can work wonders. As the saying goes, measure twice, cut once : take the time to configure it, and you’ll be mining like clockwork.
Bonus: Dual Mining Kaspa + Zilliqa (ZIL) 🚀
Here’s a trick for the sophisticated: dual mining Kaspa and Zilliqa . Sounds too good to be true? No, GMiner can do that too. The thing is, Zilliqa (ZIL) is mined differently, in bursts: once an hour for about a couple of minutes. The rest of the time, you can mine another coin. So why not combine them? You mine Kaspa practically nonstop, and when the moment comes, the miner switches to ZIL, mines its blocks (while also earning you a bonus of ZIL coins), and then returns to Kaspa. Magic? More like clever optimization of idle time.
Enabling dual mining mode is simple. Add the ZIL pool and wallet parameters to the GMiner command line:
miner.exe --algo kheavyhash --server <Kaspa_пул> --user <Kaspa_адрес>.<worker> \\
 --zilserver <ZIL_пул> --ziluser <ZIL_адрес>.<worker>
For example, for WoolyPooly + ShardPool (one of the popular ZIL pools), the command might look like this:
miner.exe --algo kheavyhash --server pool.eu.woolypooly.com:3112 --user KP1q...XYZ.rig1 \\
 --zilserver eu1-zil.shardpool.io:3333 --ziluser zil1...ABC.rig1
Please note: Zilliqa has a different wallet , starting with “zil…”. You can create one on the exchange or through the official ZIL wallet. The worker name can remain the same or different—it doesn’t matter.
GMiner will automatically switch between algorithms. For now, we’re mining Kaspa as usual. As soon as a Zilliqa slot arrives (every 1-1.5 hours, depending on the pool), the miner mines ZIL for a few minutes, then switches back to Kaspa. Your KAS hashrate won’t drop significantly ; it’ll just be busy with other work for those few minutes. The end result is an increase in ZIL coins to your income. Incidentally, the developer commission for dual mining usually remains the same (1% for Kaspa and 1% for ZIL).
Miners’ experience shows that dual mining with ZIL provides a pleasant bonus, though not a huge one. It’s nice, though—the machine would have been idle for those few minutes anyway, and this way it generates extra crypto. Keep in mind that power consumption will increase by a couple of percent when switching (after all, the ZIL algorithm is different, usually less “light”). But that’s a minor detail. As long as you remember to specify your ZIL wallet and pool, why not?
GMiner also allows for more sophisticated combinations—for example, triple mining: Kaspa + Ethereum Classic + ZIL simultaneously! But that’s a bit more exotic, requiring very fine-tuning and support from the mining pool. For your first steps, KAS + ZIL are enough to experience the joys of multitasking.
Finally: your adventure is just beginning
We’ve come a long way from theory to practice: we configured GMiner for Kaspa and confirmed that this coin is not simple, but it has potential. As you can see, there’s nothing overly complicated— the setup was successful, and your rig is mining solutions for Kaspa blocks . Now all that’s left is to monitor your first KAS mining, periodically check for miner updates, and remember about security.
Kaspa continues to develop, the community is growing, which means there could be new updates, algorithm improvements, and even a price increase ahead (fingers crossed 🤞). Who knows, maybe in a year you’ll be recalling these settings while sipping tea and watching your farm break even and start generating net profit.
But even if Kaspa’s price fluctuates, you’re already armed with knowledge and good software. If necessary, you can switch to a different algorithm—GMiner supports a ton of coins, after all. However, I hope you’ll have a long and productive relationship with Kaspa.
As the classic saying goes, “Difficulties make you stronger .” Setting up a miner is only half the battle; the rest is playing with the market. Some miners immediately sell some of their mined KAS, locking in profits, while others hold on, waiting for “Lambo.” advises against getting carried away and periodically selling some of your mined assets to lock in profits. This is a perfectly reasonable idea: there are always risks, and you need to approach mining with a cool head.
In conclusion, we wish you good luck. Mining is a journey full of unexpected twists and turns. Setting up GMiner for Kaspa is just the first step. Now you have everything you need to do it confidently. May your hashrates be high, your fans quiet, and your electricity cheap! Good luck in the vastness of Kaspa, and may you earn generous blocks. 🚀
References:
Read more:
 AwesomeMiner (Crack): Download CPU/GPU/ASIC/FPGA Miner for Windows/Linux
  PhoenixMiner 5.1c: Download fastest Ethash miner with Low DevFee (Win/Linux)
  PhoenixMiner v5.0e: Download Ethereum (Ethash) GPU miner for Windows & Linux.
  NANOMINER v1.9.2: Download The KAWPOW-miner for AMD and NVIDIA GPUs
  Mining Laws and Regulations in 2025: Russia, EU, and the US
  Kaspa (KAS): Mining Prospects and Profitability in 2025-2026
  SRBMiner-MULTI CPU & AMD GPU Miner v0.4.6 [Download for Windows/Linux]