PhoenixMiner – is the fastest, possibly fastest, Ethash miner (ETH, ETC, Muiscoin, EXP, UBQ, etc.). Miner that supports AMD and Nvidia cards (including ASICs).
DevFee = 0.65%.
Changes v4.9c:
- Adding option -rate 2 to use the command name “eth_submitHashRate” instead of “eth_submitHashrate” when solo mining
- Adding support for AMD Linux drivers 19.50-967956
- Other small fixes and improvements
Setup and Configure PhoenixMiner
Supports Algorithms:
- Ethash
- Ubqhash
- ProgPOW
Below are the ready-made settings for batch files for different pools, you only need to insert your wallet and change the name of the rig:
- ethermine.org (ETH):
PhoenixMiner.exe -pool eu1.ethermine.org:4444 -pool2 us1.ethermine.org:4444 -wal YourEthWalletAddress.WorkerName -proto 3
- ethermine.org (ETH, secure connection):
PhoenixMiner.exe -pool ssl://eu1.ethermine.org:5555 -pool2 ssl://us1.ethermine.org:5555 -wal YourEthWalletAddress.WorkerName -proto 3
- ethpool.org (ETH):
PhoenixMiner.exe -pool eu1.ethpool.org:3333 -pool2 us1.ethpool.org:3333 -wal YourEthWalletAddress.WorkerName -proto 3
- dwarfpool.com (ETH):
PhoenixMiner.exe -pool eth-eu.dwarfpool.com:8008 -wal YourEthWalletAddress/WorkerName -pass x
- nanopool.org (ETH):
PhoenixMiner.exe -pool eu1.nanopool.org:9999 -wal YourEthWalletAddress/WorkerName -pass x
- nicehash (ethash):
PhoenixMiner.exe -pool stratum+tcp://daggerhashimoto.eu.nicehash.com:3353 -wal YourBtcWalletAddress -pass x -proto 4 -stales 0
- f2pool (ETH):
PhoenixMiner.exe -epool eth.f2pool.com:8008 -ewal YourEthWalletAddress -pass x -worker WorkerName
- miningpoolhub (ETH):
PhoenixMiner.exe -pool us-east.ethash-hub.miningpoolhub.com:20535 -wal YourLoginName.WorkerName -pass x -proto 1
- coinotron.com (ETH):
PhoenixMiner.exe -pool coinotron.com:3344 -wal YourLoginName.WorkerName -pass x -proto 1
- ethermine.org (ETC):
PhoenixMiner.exe -pool eu1-etc.ethermine.org:4444 -wal YourEtcWalletAddress.WorkerName
- dwarfpool.com (EXP):
PhoenixMiner.exe -pool exp-eu.dwarfpool.com:8018 -wal YourExpWalletAddress/WorkerName
- miningpoolhub (MUSIC):
PhoenixMiner.exe -pool europe.ethash-hub.miningpoolhub.com:20585 -wal YourLoginName.WorkerName -pass x -proto 1
- ubiqpool (UBIQ):
PhoenixMiner.exe -pool stratum+tcp://eu.ubiqpool.io:8008 -wal YourUbiqWalletAddress -pass x -worker WorkerName
- minerpool.net (PIRL):
PhoenixMiner.exe -pool pirl.minerpool.net:8002 -wal YourPirlWalletAddress -pass x -worker WorkerName
- dodopool.com (Metaverse ETP):
PhoenixMiner.exe -pool etp.dodopool.com:8008 -wal YourMetaverseETPWalletAddress -worker Rig1 -pass x
- minerpool.net (Ellaism):
PhoenixMiner.exe -pool ella.minerpool.net:8002 -wal YourEllaismWalletAddress -worker Rig1 -pass x
- etherdig.net (ETH PPS):
PhoenixMiner.exe -pool etherdig.net:4444 -wal YourEthWalletAddress.WorkerName -proto 4 -pass x
- etherdig.net (ETH HVPPS):
PhoenixMiner.exe -pool etherdig.net:3333 -wal YourEthWalletAddress.WorkerName -proto 4 -pass x
sh+Ethash(e.g. Ethereum and Ethereum Classic)-dwal– after the -dwal option, enter the address of the second coindcoin blake2s– the option means that you will get a second coin on the blake2s algorithm. Currently, only this dual algorithm is supported.
This is where the differences end. For completeness, you can specify additional options as in the example with Ethereum.
We recommend that you specify -tt 75 -tstop 85 -tstart 70 -fanmin 30 -fret 2 -rate 1 in order to save video cards and protect them from overheating and any unforeseen circumstances in case of failure to start the cooler control.
It would also be nice to specify a small down-cvddc 1050,1000,940,940,950,920 as well as -coin (+ coin name) so that the DAG file does not switch again – do not waste extra time and system resources. More on fine tuning below.
Failover Pools
Failover pools can be added in the epools.txt and dpools.txt files. There is an example setup in the epools file.
Use the files “epools.txt” and “dpools.txt” to specify additional pools. These files are in text format, one pool per line. 3 connection attempts will be made. The miner disconnects automatically if the pool does not send new jobs for a long time or rejects too many ball. If the first character of the string is “;” or “#” – the line will be ignored.
launch PhoenixMiner
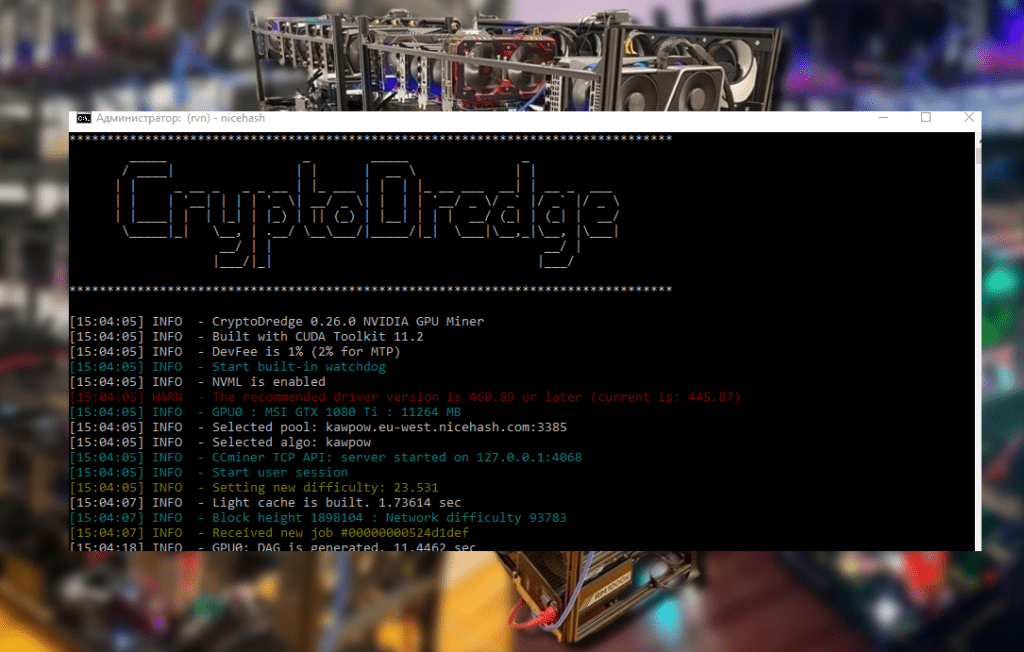
When you first start the program will tell us the following information:
startup information
- In the top line there will be everything that we specified in a body shirt
- Program version
- No CUDA driver found – Nvidia driver not found. Because we have AMD, then you should not be scared of this inscription
- Version of your graphics driver
- All available mining devices
- The program starts connecting to the pool
- Overclocking is set to 0 (we overclocked via afterburener), the core voltage is 940 mV (read about lowering energy consumption below), video card fans will try to keep the temperature at 79 °.
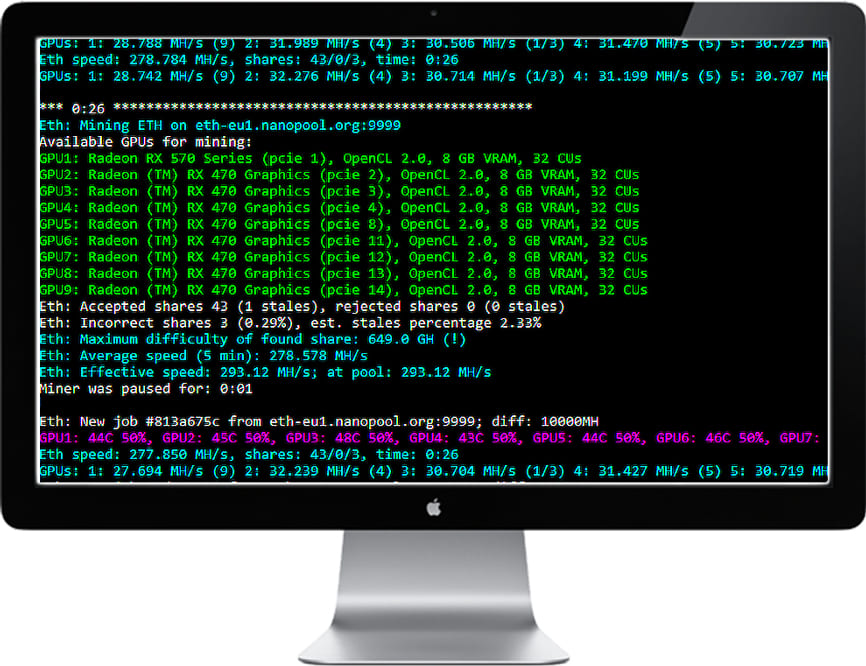
After waiting a little longer, we finally see the hash of the video cards and other data:
program console operation
- An incorrectly resolved ball is 0, (0%), an obsolete ball is also 0%. Very well!
- The maximum complexity of the balls found is 186.8 GH
- The average mining speed in 5 minutes is 174 Mh / s
- Effective speed – 155.74 Mh / s. Why is she less? Because we just started the program and the time of the first start, creation of the DAG file, etc. is taken into account. If you wait a while, then this speed will become completely the same with an average speed of 174 Mh / s
- The temperature of each video card and the fan speed in percent. The color scheme can be changed. See below
- Video card number 5 found the ball. I must say that the miners are paid exactly for the found balls.
- Pool sent a new job and indicated complexity
- Hashrate of each video card separately
We examined the basic settings that will already allow you to start mining. The first launch is recommended to be done with minimal or no overclocking of video cards and test Phoenix Miner for stability. In the meantime, the program will be tested, you can go to the advanced settings.
Recommended Related Articles:
Read more:
 PhoenixMiner 5.1c: Download fastest Ethash miner with Low DevFee (Win/Linux)
  PhoenixMiner v5.0e: Download Ethereum (Ethash) GPU miner for Windows & Linux.
  NANOMINER v1.9.2: Download The KAWPOW-miner for AMD and NVIDIA GPUs
  lolMiner 1.65: download and configure for ETH, ETHW, KAS, BNB, ETC
 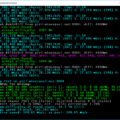 PhoenixMiner 5.2a (AMD/NVIDIA) – Download and Configure for Windows/Linux
 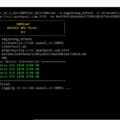 NBMiner v33.4 (NVIDIA & AMD GPU Miner for ETH, RVN, GRIN, BEAM)