This is a story about a fun project I did – I created a mining farm built into my house. The video cards were immersed in oil, which caused the loggia to heat up from its heat.
Problem statement
In 2019, I wanted to set up a mini workshop on my poorly protected loggia from the cold. Although a simple heater would have sufficed, I wanted to do something more exciting and interesting. After seeing how the mining equipment produced a lot of heat, I came up with a plan to build a mining farm. Not only would it serve the purpose of mining directly, but it could also be used as an efficient way to provide the necessary heat for the room. Since the loggia is small (only 3 m²) and the main area will be occupied by the work area, there is only room for the farm in a narrow cabinet along the wall, which also has to be designed and assembled.
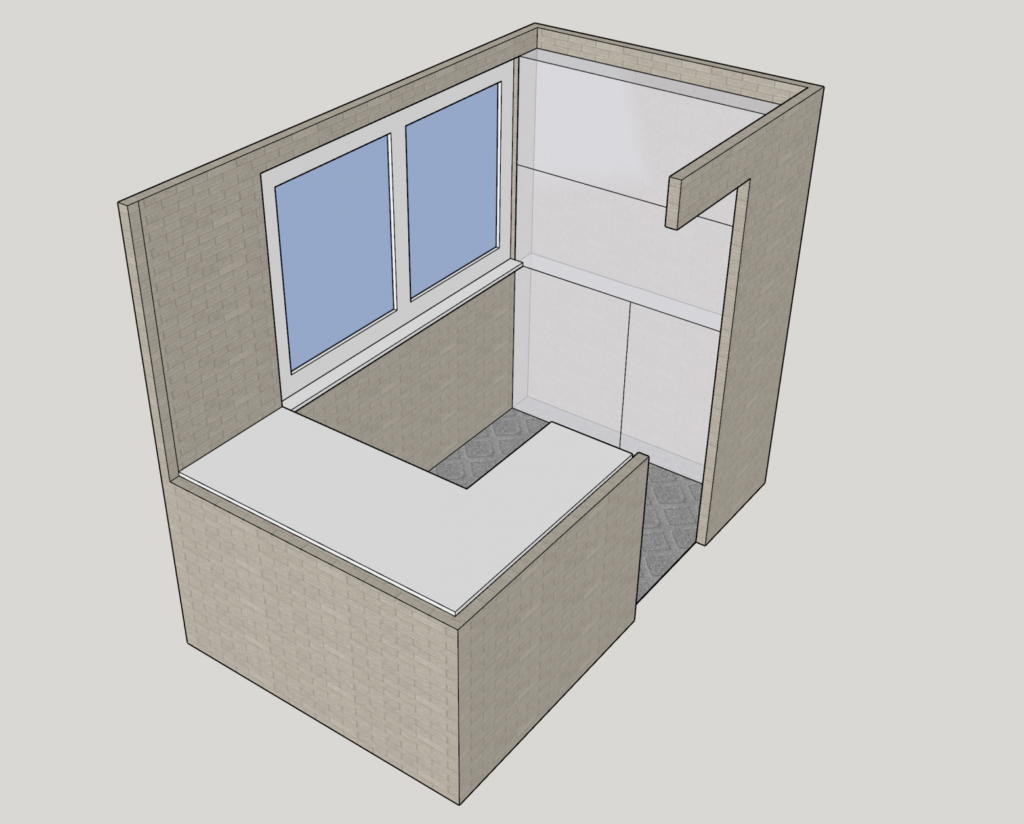
Requirements for a mining farm:
- Matched the dimensions of the closet along the wall
- Heated the loggia to a comfortable temperature in winter and, if possible, dissipated the heat produced to the outside in summer
- Was relatively quiet, so it was comfortable to be in the room
- Was not rigidly tied to a specific mining equipment, provided the possibility to install both video cards and asics
- Had a neatly closed case and was not afraid of dust
- Had the ability to remotely control and monitor the status of
- Was profitable (recouped electricity and brought in revenue) given the prices at the start of the project
Important remark on the issue of profitability. oddly enough, profitability is not the main goal of this project. I wanted to make an interesting project, when I work on which I would get new skills, and the result pleased my eyes and fit into the interior. If my goal were only a profit, it should be assembled a simple rig from video cards on a wooden frame and place in the garage.
relevant skills before the start of the project
- Basic C++ development experience, no interest in low-level optimizations
- Experience in electronics at the level of knowledge of Ohm’s law and Kirchhoff’s rules
- Zero experience in PCB design
- Experience with Arduino-like controllers at the level of understanding basic examples (LED flashing, motor control, working with different modules for which there are ready-made libraries)
- Experience with a 3D printer and modeling skills at the level of drawing simple angular models in SketchUp
- Zero experience with CNC machines
- Zero experience in furniture design
Concept
Iron Selection
At the moment, it can be simplified to say that cryptocurrencies that provide mining, or rather their algorithms are divided into two types: those for which there are asics, and those for which they do not (or there are, but for one reason or another they are not widely used).
Thus, there are two main types of equipment:
- ASIC. A specialized device designed for mining on a given algorithm, mostly for SHA-256 (Bitcoin), but also for some others. Some have a built-in power supply and some require an external one.
- GPU. Videocards are used to mine most of those coins for which there are no asics. They cannot work autonomously, and must be connected to the computer’s motherboard.
I chose video cards because they are more flexible in terms of algorithm and coin selection for mining, but I want to leave the hypothetical possibility of replacing them with asics. For me the minimum set of equipment consists of:
- Video cards with raisers (PCI-E bus extenders)
- Motherboard (with minimum CPU and memory)
- A power supply of appropriate capacity
A hard disk or SSD is not necessary, the system can boot from a USB flash drive.
Choice of cooling method
Usually mining farms are air-cooled and therefore very noisy. But I need to make a farm that is not noisier than a good computer and not afraid of dust in the air. An alternative to air cooling is liquid cooling.
The most common two approaches to its implementation:
- Liquid cooling systems (LCS). The hottest parts of the computer (CPU, graphics card) instead of coolers are equipped with water blocks, through which distilled tinted water with anti-corrosion additives is circulated. It is actively used in high-powered gaming PCs.
- Immersion cooling. The equipment is completely immersed in a container of dielectric fluid. There are ready-made solutions in the form of baths for mining.
Of course, in both cases, the liquid itself does not solve the cooling problem. It is a coolant that also needs to be cooled, but it gives a lot of flexibility in how the system is built. For example, the fluid can be routed through a large radiator, and in some cases you can even do without fans. Also, the radiator can be placed outside the room, for example on the facade of the house, as an outdoor air conditioner unit, which is especially effective in the cold season.
I am aware of examples of building farms with waterblocks for each video card, but for a number of reasons I chose the immersion cooling method. Here is my reasoning:
- Waterblocks are noticeably more expensive than good immersion oil, in my case the difference in price was almost twofold
- Waterblocks cool only the part of the equipment to which they are adjacent, while immersion cooling is more uniform
- With water cooling there is a risk of short-circuiting at the slightest water leakage
- Waterblocks are not universal. Usually a particular waterblock fits only to a specific video card from a specific manufacturer and not every video card can be found on the market. Of course video card vodoblocs are not suitable for asics. In the same way I haven’t seen any waterblocks for power supplies and they are also noisy and warm. In the bath of immersion liquid you can drop everything that can fit into it in terms of dimensions.
The choice of immersion fluid
Now it is necessary to choose an immersion fluid, in which the equipment will be immersed. I have considered the following options:
- Distilled water. In theory, pure water is a dielectric, but in practice it is very difficult to ensure its purity and absence of impurities. Like ordinary water, it can freeze and also evaporates rather quickly.
- “Dry water”, e.g. Novec 1230, and its analogues. Designed for firefighting in data centers, but theoretically can also be used for immersion cooling, there are clips from booths at trade shows, where such a possibility is demonstrated, but in general it is an exotic option.
- Mineral oils. Unlike water, they are generally more stable in their properties. They thicken and solidify at low temperatures, but unlike water, they do not turn to ice and do not burst pipes. The disadvantages of oil compared to water are lower heat capacity, higher viscosity and difficulty with cleaning equipment after extraction.
In the end, I chose STE Oil Crystal Plus 70T mineral oil because I found many projects on the Internet using it. The cost per liter depends on the purchased volume, and in my case it was about 550 rubles. There are cheaper analogues, but I decided not to take the risk. The claimed properties of this oil:
- Colorless, with no perceptible odor.
- Of course it is dielectric (does not conduct current)
- Non-toxic, seller claims it can be used to treat the stomach
- Not corrosive to metals, plastic parts and wire insulation
- Viscosity feels comparable to sunflower oil and depends on temperature (the lower it is, the more viscous it is)
- Flash point 198 °C
- Curing temperature -60 °C
The stated temperatures are completely satisfactory to me, because the temperature limit of the video card is 80 °C and the air temperature in my city usually does not fall below -30 °C.
So, I chose video cards and immersion oil mining, so my farm will consist of the following basic elements:
- Tanks with immersion oil (aquarium)
- Video cards and power supply inside the aquarium
- Motherboard over the aquarium
- Radiator heating, which will provide warmth in the cold season
- Outdoor radiator with a fan to exhaust excess heat to the outside
- Piping connecting the aquarium with the radiators
- Circulation pump
- Motorized taps to control the flow of coolant through the radiators
- Flow, temperature and other sensors
- A controller that will take sensor readings, control taps, and turn on/off the motherboard. The controller must also transmit telemetry to the cloud and enable remote control
- Simple controller interface in the form of a monochrome display and encoder button for displaying sensor data and local control
Design and implementation
Closet
To make the most efficient use of the space of a small loggia as a workshop, I decided to design a cabinet in which, in addition to the aquarium farm with all the associated equipment and piping would be provided as well as drawers for storing tools. Cabinet planned recessed, ie, its width is almost equal to the width of the wall from door to window, and small gaps on the edges will be closed by a decorative corner. Also its feature is a great height at a depth of only 15 cm, so it will be fixed to the wall in several places for stability.
I had no previous experience designing furniture, but it turned out not to be that difficult. I would say that to create such a cabinet, you only need to know what types of furniture fasteners exist (screws, eccentrics, couplers between sections), fittings (hinges, gaslifts) and what clearance should be provided between the facades of drawers. Designing was performed in SketchUp program with the help of “Universal panel” plug-in. It allows you to export a list of used parts with all their characteristics (name, size and presence of edges) for subsequent ordering. White laminated chipboard 16mm thick was selected as a material. The result of the design is shown in the photo below.

It is very difficult to normally saw a sheet of laminated chipboard at home, and even more so to apply the edging, so I turned to a furniture company. The specifics of my order was that three parts have a cutout in the form of a rectangle with rounded edges, obtained by milling, on which the edge is then applied. Not all companies do this kind of milling, so I do not recommend resorting to such solutions. It is also worth mentioning the service of “fitting holes”, when in addition to sawing, furniture makers use industrial equipment to drill holes in the received parts for fittings and fasteners, but I did without it and drilled all by myself.
I will not describe the assembly in detail, I will only say that of the tools I had enough of a good screwdriver, a drill for mortars, a special drill jig for drilling holes for hinges and a couple of corners for fixing the parts printed on a 3D printer.
Another feature of the cabinet is LED lighting in each drawer, which automatically turns on when it is opened.
Aquarium
I needed to make a tank for pouring immersion oil and placing the equipment there, which would meet the following requirements:
- Exactly the specified dimensions, as it is placed inside the cabinet against the walls of the cabinet
- Was resistant to high oil temperature
- Was transparent for visual control of the equipment and for beauty
These requirements are quite satisfied by glass aquariums, but I could not buy ready-made because of the specificity of the required dimensions, so I decided to make it myself. Designing such an aquarium is elementary, you only need to take into account the necessary gaps between the panes for the sealant layer and choose a sufficient thickness of glass. These parameters are easy to calculate in an online calculator.
Sometimes aquariums are made of special clarified glass, but I chose ordinary silicate glass with a thickness of 10 mm. Its advantage is the low price and widespread availability, the disadvantage is the noticeable green tint, which is especially noticeable at this thickness. After calculating the necessary dimensions of the parts, I ordered them cut and sanded the edges at a glass company.
Having received the glass parts, I had to glue them together using a special aquarium sealant. To fix the walls while the sealant cured, I made a small stand with holders printed on a 3D printer, fixed on a sheet of chipboard and small spacers to provide a gap between the panes.

Filling the seams with sealant would not have been so difficult if it were not for the specific shape of the aquarium. Because of the small distance between the front and back wall, it was very difficult for me to wield the sealant gun inside, and in the end the first attempt at filling failed. The joy of scraping the half-cured sealant off the glass and my hands is hard to convey in words. For the second attempt, I had a special angled spout for the tube, printed on the printer, and finally made it. It took 10 days for the sealant to cure completely. After that, I placed a mirror on the bottom of the aquarium for beauty, and successfully installed the aquarium in the cabinet.

Mining equipment
As I said before, I chose video cards as my mining equipment, with the hypothetical possibility to replace them with asics. In this section I will talk about the choice of specific hardware and how to place it in the aquarium.
Video cards
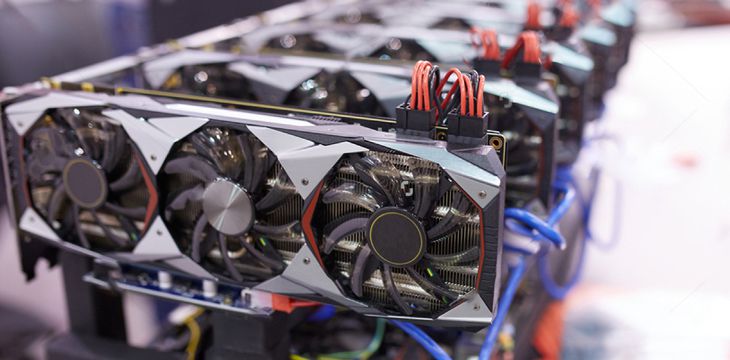
When choosing video cards for mining, in addition to their main indicator – the hash rate – it is necessary to consider the available amount of video memory, because some algorithms (e.g. Ethash) require keeping in memory a so-called DAG-file, which is slowly growing in size. In particular, in December 2020, Ethereum’s DAG size exceeded 4 Gb, which significantly reduced the efficiency of video cards with less memory. Therefore, I chose cards with 8 Gb of memory. AMD and Nvidia cards slightly differ in efficiency on different algorithms and overclocking potential, so for diversification I bought cards of two models at once:
- 6 pcs. MSI AMD RX 580 8 Gb Mining Edition
- 6pc. MSI NVIDIA P104-100 (mining-version of GTX 1070 card). Formally have 4 Gb of memory, but can be reflashed to use the actual 8 Gb of video memory available on the board
The features of the mining versions of video cards are a smaller number of video outputs, a short warranty and minimal packaging, but their price is lower than that of regular cards. My RX 580 and P104-100 have a similar design, but are slightly different in size (P104-100 is slightly wider and taller).
Motherboard
There are special models of motherboards for mining which have a large number of PCI-E slots and some optimization in the BIOS. I chose the ASUS B250 MINING EXPERT. As a processor I used a cheap Intel Celeron G3900, which is enough to run mining. I also installed two inexpensive DDR-4 RAM modules of 4 Gb each, although in fact one module would have been enough.
Power Supply
I have calculated that I need at least 1500W power supply for graphics cards and motherboard, and better up to 2500W power supply for perspective replacement with asics. Usually regular computer PSUs have power between 300 and 1000 W, and sometimes a PSU of the required power is obtained from two identical units connected with the help of a special synchronizer. Another solution is to use powerful server power supplies, the power of which usually ranges from 1500W to 3000W. Server PSUs are designed for continuous work under load, have high efficiency and are very reliable, but they have their own specific feature – they provide only 12 volts, while motherboard and graphics cards require other voltages (+3.3V, +5V, -12V). For motherboard this is solved by installing a special DC-DC converter (so-called Pico PSU), and for power raisers graphics cards use separate converters for 5 volts (depending on the type of raisers). As a result, I chose the HP 2450W server power supply, known in the mining community as “ski” because of its elongated shape.
Rysers
Riser is a PCI-E x1-x16 bus extender which allows graphics cards to be placed at a certain distance from the motherboard. There are loopback raisers, but in mining the most common raiser with additional power, which uses a USB 3.0 cable for data transfer (though only as a loopback to connect the two parts of the raiser – you can not plug it into the motherboard USB port). They differ in the type of power connector and the configuration of the voltage converters they have. I used raisers version 006 in which the additional power is fed through the connector Molex.
Suspension system
The suspension system provides a compact arrangement of the equipment inside the narrow aquarium and makes it possible to lift it up for maintenance. The base are two rails in the form of metal square profiles 20×20 mm, positioned above the aquarium. On their underside, the RGB LED strip is glued on for illumination. The rails can be raised and lowered thanks to furniture telescopic mechanisms at both ends. In the center, the rails are connected by a jumper to which a braided steel cable is attached, extending upwards into the space behind the cabinet fascia, where it is connected to the linear actuator responsible for lowering and raising them through a system of pulleys.

The graphics cards are paired back-to-back with a small gap and are hung with special holders put on top of the rails. They are printed from ABS plastic and painted with black spray paint. Also, each video card has a small step-down DC-DC converter attached to the side of the raiser board on the left side, providing it with 5V.

The power supply is mounted in the same way, but its mounting is extended with threaded bars so that it is located under the video cards. Along the power supply there is also a bar to which the power terminals for the video cards are attached.

The motherboard, on the other hand, is placed in a small recess above the aquarium. There was no point in placing it in the oil – it is almost silent and does not get warm during operation.
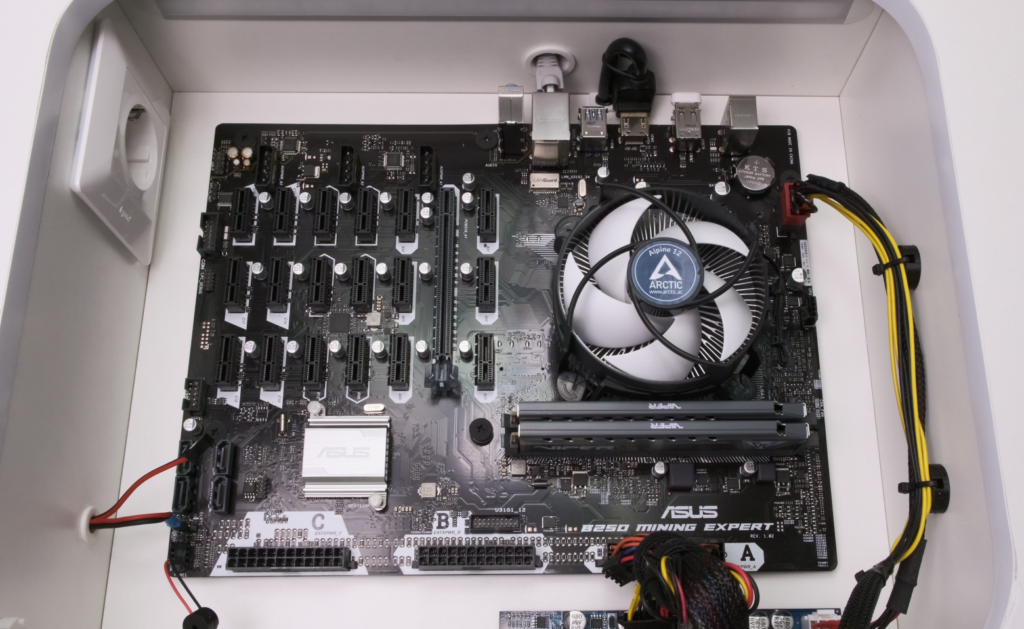
If necessary, graphics cards can be replaced by an asic, removed from the chassis and disassembled into separate boards, for which you will need to make their own holders, and the PSU, given the power reserve and probably do not have to change.

Soft
To manage the process of mining, a flash drive with HiveOS system is plugged into the motherboard, where you can start or stop the mining process, monitor the equipment and overclock video cards through a dashboard. This system allows you to set a stop of mining or shutdown in case of overheating, but it is not enough for effective management of the farm, for the following reasons:
- If overheating stops mining, the cards still continue to consume energy in standby mode, making the cooling process inefficient
- If the system shuts down when overheated, the motherboard loses communication with the server and will not be able to turn itself on after it cools down
- The motherboard is not well suited for receiving information from sensors and controlling motorized cranes
Therefore it was decided to develop a separate controller, which in addition to working with sensors and drives will literally through optocouplers close the contacts of the motherboard power button (as well as tumbler power supply). I will tell you about it a little later.
Pipeline
The piping connects the aquarium with the cooling circuits. At the right and left ends of the aquarium there are two sockets, the right one takes the hot oil to the radiators, and the left one takes the cooled oil back. In this way, the oil flows from left to right in the aquarium. The DS18B20 temperature sensors and small nets for protection against accidental debris entering the piping are installed on the ends of both spigots.
Polypropylene pipes designed for hot water, which must withstand temperatures up to 95 °C, were used for the piping. Their installation is very simple – they are cut with a special hand tool and soldered with an inexpensive electric soldering iron.

In the lower compartment of the cabinet, there is a special drawer that houses the circulation pump (a conventional 70W underfloor heating pump) and a pair of motorized tap – flow rate sensors for both cooling circuits. It is planned that the controller will be able to smoothly control the taps and the sensors will provide it with feedback.

The heating radiator of the premises
The first cooling circuit is represented by a conventional 12-section radiator, located in a niche under the window. I chose an aluminum radiator, because it has a better heat output compared to cast iron and bimetallic, and their advantage in resistance to corrosion and high pressure in my case does not play a role.

I covered the radiator niche with a sheet of chipboard, to which I glued a thin laminate for decorative purposes, and covered the notch for the radiator with a plastic grid.
Street radiator
The second cooling circuit is an outdoor radiator, additionally equipped with a fan. Its design is inspired by the appearance of the external unit of an ordinary air conditioner. For the body I chose aluminum composite – a sheet material of two layers of thin aluminum, between which there is a thick layer of plastic. In nature, composite is found in the form of ventilated facades on houses and in advertising signs, so it was not difficult to find a company engaged in its cutting. Also, the composite can be milled under the bend, but I ordered separate parts, which were connected with screws with the help of 3D-printed racks from ABS plastic. Inside, there are two car radiators and a 10″ fan. The original plan was that one radiator would be used by the mining farm and the other would cool antifreeze for another liquid-cooled computer, but then I changed my mind and connected it to the farm in parallel to the first one.
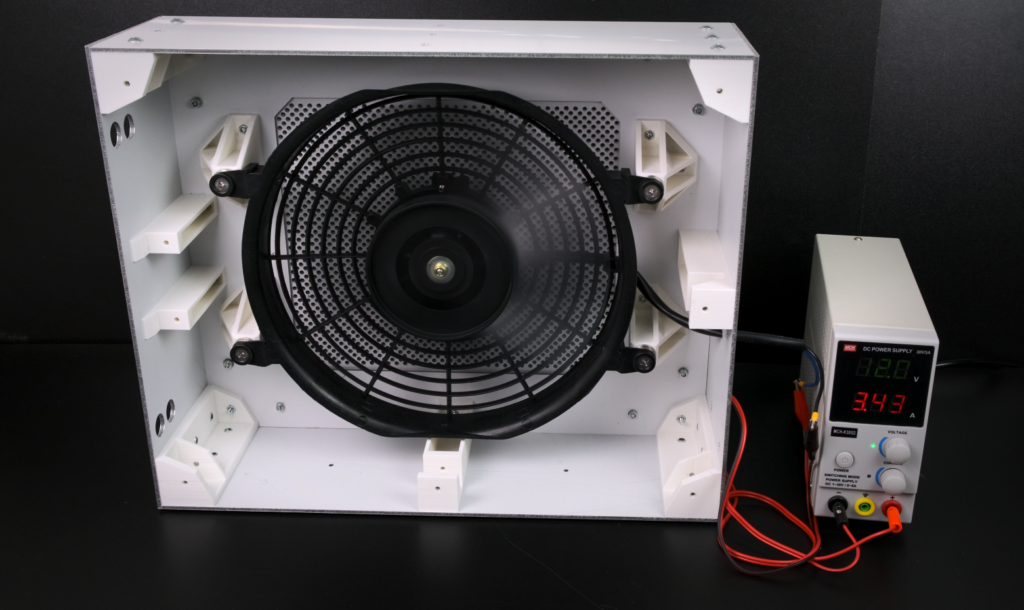

The difficulty in installing the outdoor unit was the uneven surface of the facade of the house, covered with pyramidal protrusions, which was solved by fixing the unit at three points, with a small gap from the facade to ensure air access.

The radiators are connected to the truss piping by flexible car hoses, protected from the outside environment by cable corrugations. Noise of the fan at medium speed is less than the noise from the adjacent outdoor unit of a conventional air conditioner.

Controller
The main tasks of the controller are to start and stop mining (by turning the motherboard and PSU on and off), control the flow through the cooling circuits, get information from the sensors and transfer it to the cloud.
Electronics
As a controller I chose a debug board with STM32F103 microcontroller known as “Blue Pill”. You can say that for me it is “arduinka on maxima”, it is much better than the widely used Arduino Nano and its analogs. As an alternative I was considering boards with ESP32 controller (have built-in BT/WiFi, which I don’t need as I’m going to use Ethernet connection) and Arduino Mega (a bit redundant for my tasks). Now I would probably choose the Raspberry Pi Pico board, but it wasn’t available at the time. Of course the coolest way would have been not to use the debug board, but to unsolder the stripped down controller. But I had no experience in electronics, so I did not take any chances and tried to use prebuilt modules as much as possible. The schematic diagram of the controller board is shown in the figure below.

I will list the components column by column from top to bottom, left to right:
- DC-DC step-down converter modules for 5 and 3.3 volts to power the controller and peripherals
- Solid state relay module responsible for switching the circulation pump on/off
- OLED display for displaying information, connected via I2C interface
- Powerful driver L298N for controlling the linear actuator raising and lowering the equipment from the aquarium. Since the logic level of this module is 5 V and the controller has a logic of 3.3 V, a module with level converters is installed in front of it.
- The L293D microcircuit is used to control two motorized valves. They have signal outputs which are shorted to ground when fully open/close. Also a level converter is used to control the microcircuit.
- DS18B20 temperature sensors mounted on the inlet and outlet connections as well as on the circulation pump housing. They are connected via 1-Wire bus.
- LED RGB strip on rails for equipment illumination. Each channel is controlled by an IRL510 MOSFET transistor. The low threshold voltage of these transistors allows you to do without level converters.
- STM32 Blue Pill board. For debugging there is a log output via UART interface, but due to the lack of pins the control circuit of the green and blue backlight channel is switched off. The switching is done with the jumpers on the board.
- Flow rate sensors for both cooling circuits. They work on the principle of pulse counting and are connected to pins with hardware interrupt support.
- Encoder with button for local control of the controller.
- Ethernet module for communication with the cloud. It is connected via the SPI interface.
- The power contacts of the motherboard and the power supply are shorted through optocouplers. They are powered by a 5 V voltage switched on through bipolar transistors.
The circuit board was designed in the free EasyEDA editor, and ordered from JLCPCB. It cost a little more than usual because of its elongated shape due to the height of the space behind the raised panel above the aquarium. This was my first experience with PCB design. Later, having studied the subject more deeply, I can say that my board lacks separation of analog and digital ground, although I have not noticed any negative effects from this yet, probably because of the small current of the analog consumers and the fact that the step-down converter modules already have capacitors on the output.


Programming
To program the controller I used the STM32duino framework to be able to use the many Arduino-compatible libraries written for the modules I use.
The code was developed in the Visual Studio Code environment with the PlatformIO plugin.
One of the requirements for the controller is the possibility of remote control and monitoring of telemetry. Of course, such functionality can be made in the form of a web server on the board itself, but in my opinion this solution is a bicycle and loses on many aspects of the use of special cloud services for IoT devices. I considered different services such as Arduino Iot Cloud, Thingsboard and Thinger.io. But in the end, my choice fell on the updated Blynk , in which, in addition to a good mobile application, web dashboarders added.
I will briefly tell you how Blynk works. The basis of its concept are the so-called “virtual pins”, in fact, they are just variables of a given type (number, string, etc.), which are synchronized with the server by means of the library. For example, to transmit oil temperature to the server, the controller periodically saves the value from the sensor to the specially created virtual pin, it is stored on the Blynk server, and to monitor it I create a corresponding widget (simple line, scale, timeline) on the dashboard, linked to this pin. Similarly, the virtual pin can be controlled from the dashboard – for example, using a widget-button, then the board itself can process the change of its state – for example, the button to turn off the mining is implemented that way.

Blynk also solves the problem of data exchange between the controller and the motherboard. This is implemented by running my Python script at HiveOS startup, which collects telemetry about the mining process (hash rates, video card temperatures, etc) and periodically sends it to the Blynk server. The controller receives it, and thus has access to all the information about the state of the system, not just the information it has from its sensors.
Let me list the main implemented functions of the controller at the moment:
- Remote enable/disable mining, telemetry transmission
- Temperature control of equipment, its complete shutdown in case of overheating and automatic activation after cooling
- Hardware restart in case of errors and freezes
- Oil temperature indication through color change of RGB ribbon on rails
- Control of motorized cranes and lifting actuator via local menu

Interface
In addition to the dashboard described above in the Blynk mobile app and its web version, the controller has a simple physical interface, represented by a two-line OLED display and an encoder with a built-in button. When turned on, it cyclically displays screens with all available telemetry (oil and video card temperatures, current coin, hash rate, time since load, etc.), while pressing the encoder button opens a menu for manual control (on/off, reset, taps, drive, pump, etc.). After 10 minutes of operation the display automatically turns off, but is activated by any encoder rotation.
The panel with the display and encoder is made from the remnants of the composite sheet used to make an outdoor radiator enclosure. I cut it out on my CNC 3018 milling machine and sanded the paint down to bare aluminum. I also cut a little glass for the display out of light blue plexiglass. The cutout in the bezel was ordered from a furniture maker. To fix the panel, a small spacer, printed on a 3D printer from blue PLA, is installed in the cutout.


Startup and refinement
When all the assembly was completed, I had to pour oil into the system and start it up. Just pouring oil into the tank was not possible – the circulating pump would not be able to suck it through the inlet pipe, so I pumped oil into the system from a canister with a small high-pressure pump. I blew the air out of the radiator by closing the Mevsky valve when it started leaking oil.

However, the air was not completely removed. After filling the system, I added oil to the aquarium, and the regular pump was already quite able to pump it, but there were still small air bubbles coming out of the outlet pipe for a long time.

Then, using the drive, I submerged the video cards and power supply unit into the aquarium. Despite the fact that immersion oil is obviously dielectric, the process of immersing expensive equipment in the liquid was quite exciting and nervous. It was only after the coolers spun merrily and silently in the oil that I exhaled with relief.

When mining started, I began the process of overclocking video cards, which aims to increase the hash rate and reduce the heat while maintaining stability. This is a separate topic, I will not describe it in details, I can only say that it boils down to the selection of parameters (core frequency, memory, etc.) and the subsequent evaluation of performance and system stability. The difficulty is that there are no universal parameters for a particular model of video card, and the optimal values must be selected for each specific card individually, by trial and error.

Unfortunately at the design stage I lacked the skills to model thermodynamic systems, so I did not understand until the launch whether my cooling system is insufficient or redundant. Practice showed that it was rather insufficient – the external unit with the air cooling has to be used on a regular basis. But the internal radiator copes perfectly with the heating of the room, which is especially nice in the off-season. In summer, the system often overheated, in the hottest days I put in front of the aquarium usual household floor fan, but he died after about a month of daily use, good thing he managed to give the warranty. Then to improve cooling, I added another circuit – a heat exchanger, through which a separate pump pumps normal water, which I poured into a 30-liter oil canister. As the water in the canisters heated up, I moved the hoses to another one, and while the new one heated up, the old one had time to partially cool down.

To increase the efficiency of the internal radiator, I added two homemade servo slides with coolers to the niche, which allow the niche to be ventilated with street air in the summer, and in the cold, especially in case the farm is turned off, can be easily closed.

In addition to this, I installed an assembly of 80mm coolers on the heatsink, 10 on top and 10 on the bottom. At 12 volts they are quite quiet, and can only be heard if you get close to them at point-blank range.

UPD I often get asked how video card coolers behave in oil. They work fine, and when they are turned off, the heat on the video cards increases slightly. I would assume that the coolers help stir up the oil surrounding the card chips a bit.
Results

Despite the fact that the project took 2 years of work in the background, I consider its goal achieved. I made a heater that heats the room perfectly and got an interesting interior element.
The built cooling system generally copes with its task in the cold season and off-season, and in summer it can work with additional water cooling. But this applies to mining in 24/7 mode, but if in summer to mine only at night, even without additional efforts the existing cooling system is quite able to solve its tasks.
I will not describe the financial aspects of this project in details, because it would be senseless to repeat it now anyway, not even because of the lack of graphics cards or the rise in the dollar, but because of the imminent transition of Ethereum currency to PoS, after which the prospects of GPU mining will be very dim. Nevertheless, the project fully paid off and even helped me to stay afloat in our difficult times.
I consider the main result of this project to be the skills and experience I gained in new industries. As recent events have shown, everything in this world is frail. Today the currency may depreciate, tomorrow the apartment will burn down. Skills are not subject to currency fluctuations and are not tied to material resources. If I keep them up to date, they will stay with me as long as I live.
Read more articles about cryptocurrencies and mining at COOL-MINING.ORG.
Do you like to read similar articles about cryptocurrencies and mining, do you want to support me as an author or ask questions? Be the first to know the news, subscribe to my telegram channel
