PhoenixMiner 5.1c: самый быстрый майнер Ethereum / Ethash с наименьшей комиссией разработчика (Win / Linux)
ВАЖНО! Все владельцы карт AMD с 4 ГБ оперативной памяти должны обновить PhoenixMiner до версии 5.0e или более поздней, чтобы продолжить майнинг после эпохи DAG 350 (как ETH, так и ETC уже прошли эпоху DAG 350). Кроме того, вот несколько важных советов для максимально долгого использования карт AMD с 4 ГБ оперативной памяти с PhoenixMiner 5.0e и более поздними версиями:
Цитата
- Если в вашей системе используется процессор Intel, используйте интегрированную графику в качестве основного адаптера дисплея. Для этого зайдите в настройки BIOS материнской платы и измените параметр “Primary display adapter” на iGPU (или интегрированный GPU). Также, если вы используете обычный монитор или разъем HDMI, подключите его к видеовыходу материнской платы.
- Если вы не можете использовать интегрированный GPU, замените основной GPU на тот, который имеет 6 или 8 ГБ VRAM.
- Не переходите на новый драйвер AMD, если он явно не поддерживается PhoenixMiner. Для карт AMD с 4 ГБ VRAM это не только снизит хэшрейт, но и сделает невозможной добычу, когда эпоха DAG превысит 350.
- После того, как эпоха DAG станет больше 350, оптимальное значение -gt для карт AMD с 4 ГБ VRAM может измениться. Поэтому мы рекомендуем повторно запустить автонастройку после эпохи DAG 350, чтобы найти оптимальные значения GT для карт.
После обширного тестирования драйверов AMD для Windows в течение последних двух лет или около того, мы выделили две большие группы драйверов:
- Хорошие драйверы. Это версии от 18.12.1.1 до 19.7.5 (включительно) и от 19.12.2 до 20.8.1 (включительно). Они позволят вам вести добычу до эпохи DAG 372-373 и не потребуют перезапуска PhoenixMiner при каждом изменении эпохи DAG.
- Не очень хорошие драйверы. Это версии с 18.1.1 по 18.10.1 (включительно) и с 19.8.1 по 19.12.1 (включительно). Это позволит вам добывать до эпохи DAG 365-366 и потребует перезапуска PhoenixMiner при каждом изменении эпохи DAG (для этих драйверов это будет происходить автоматически, если вы не добавили опцию командной строки -dagrestart 0 для явного отключения автоперезапуска).
- Если вы используете пул с автоматическим переключением между монетами (например, nicehash), вам следует использовать один из хороших драйверов, описанных выше, и не использовать опцию -dagrestart.
- Драйверы старее 18.1.1 не тестировались для работы с 4 ГБ DAG. В частности, есть несколько сообщений о том, что старые драйверы блокчейна от 2017 года не работают с 4 ГБ картами после эпохи 350. Если вы все еще используете драйверы блокчейна, вам необходимо обновить их до более новых, если у вас есть карты AMD на 4 ГБ. После этого не забудьте включить режим Compute для всех карт в центре управления AMD.
В Linux все относительно свежие драйверы (т.е. последние 24-36 месяцев) позволяют майнить до эпохи 378-380, но ошибок в драйверах гораздо больше, так что если вас устраивает ваша текущая версия драйвера, не меняйте ее.
Изменения в версии 5.1c (с версии 5.0e):
- Добавлена поддержка коррекции таймингов VRAM для карт Nvidia серии 10×0 (см. новые параметры командной строки -straps, -vmt1, -vmt2, -vmt3, и -vmr для получения дополнительной информации)
- Добавлен новый параметр -nvmem для принудительного использования ремней даже на неподдерживаемых графических процессорах Nvidia (используйте -nvmem 1 для карт GDDR5, или -nvmem 2 для карт GDDR5X)
- Добавлена опция -ttli для автоматического снижения скорости майнинга, чтобы избежать перегрева GPU выше целевой температуры (полезно, когда опция -tmax не поддерживается драйверами)
- Добавлена поддержка последних драйверов AMD 20. 8.1 под Windows и 20.20-1089974 под Linux
- Устранены давние проблемы с опцией -gpow, которая теперь работает корректно
- Удалены некоторые мертвые альткоины на основе ethash и обновлена поддержка остальных
- Много других мелких улучшений и исправлений
PhoenixMiner – это быстрый (возможно, самый быстрый) майнер Ethash (ETH, ETC, Muiscoin, EXP, UBQ и т.д.), который поддерживает как карты AMD, так и Nvidia (в том числе в смешанных майнинговых установках). Он работает под управлением Windows x64 и Linux x64 и имеет комиссию разработчика 0,65% (самую низкую в отрасли). Это означает, что каждые 90 минут майнер будет добывать для нас, своих разработчиков, в течение 35 секунд. PhoenixMiner также поддерживает Ubqhash для добычи UBQ, ProgPOW для добычи BCI, а также двойную добычу Ethash/Ubqhash с Blake2s.
Скорость в целом выше, чем у майнера Claymore для добычи Ethereum в режиме eth only
(мы измерили примерно 0,4-1,3% улучшения скорости, но ваши результаты могут быть немного ниже или
но ваши результаты могут быть немного ниже или выше в зависимости от GPU). Для достижения максимально возможной скорости на картах AMD может потребоваться вручную настроить коэффициент настройки GPU (число от 8 до примерно 400, которое можно изменить интерактивно с помощью кнопок + и – во время работы майнера).
Если вы пользовались майнером Claymore’s Dual Ethereum, вы можете перейти на PhoenixMiner с
поскольку мы поддерживаем большинство опций командной строки и конфигурационных файлов Claymore.
файлы.
Пожалуйста, обратите внимание, что PhoenixMiner тщательно протестирован на многих майнинговых установках, но все еще могут быть некоторые ошибки.
Кроме того, мы активно работаем над добавлением множества новых функций в будущих релизах.
Если вы столкнулись с какими-либо проблемами или у вас есть пожелания по функциям, пожалуйста, опубликуйте их здесь (в этой теме).
Мы сделаем все возможное, чтобы ответить своевременно.
1. Быстрый старт
Если вы хотите проверить целостность загруженного файла, используйте следующие хэши (последний файл PhoenixMiner_NVRTC_Windows.zip нужен только в том случае, если вы хотите добывать BCI с помощью карт Nvdia под Windows):
Здесь приведены параметры командной строки для некоторых наиболее популярных пулов и монет:
  PhoenixMiner.exe -pool eu1.ethermine.org:4444 -pool2 us1.ethermine.org:4444 -wal YourEthWalletAddress.WorkerName -proto 3
ethermine.org

(ETH, secure connection):
  PhoenixMiner.exe -pool ssl://eu1.ethermine.org:5555 -pool2 ssl://us1.ethermine.org:5555 -wal YourEthWalletAddress.WorkerName -proto 3
ethpool.org

(ETH):
  PhoenixMiner.exe -pool eu1.ethpool.org:3333 -pool2 us1.ethpool.org:3333 -wal YourEthWalletAddress.WorkerName -proto 3
nanopool.org

(ETH):
  PhoenixMiner.exe -pool eth-eu1.nanopool.org:9999 -wal YourEthWalletAddress/WorkerName -pass x
nicehash

(ethash):
  PhoenixMiner.exe -pool stratum+tcp://daggerhashimoto.eu.nicehash.com:3353 -wal YourBtcWalletAddress -pass x -proto 4 -stales 0
f2pool

(ETH):
  PhoenixMiner.exe -epool eth.f2pool.com:8008 -ewal YourEthWalletAddress -pass x -worker WorkerName
miningpoolhub

(ETH):
  PhoenixMiner.exe -pool us-east.ethash-hub.miningpoolhub.com:20535 -wal YourLoginName.WorkerName -pass x -proto 1
coinotron.com

(ETH):
  PhoenixMiner.exe -pool coinotron.com:3344 -wal YourLoginName.WorkerName -pass x -proto 1
ethermine.org

(ETC):
  PhoenixMiner.exe -pool eu1-etc.ethermine.org:4444 -wal YourEtcWalletAddress.WorkerName
epool.io

(ETC):
  PhoenixMiner.exe -pool eu.etc.epool.io:8008 -pool2 us.etc.epool.io:8008 -worker WorkerName -wal YourEtcWalletAddress -pass x -retrydelay 2
whalesburg.com

(ethash auto-switching):
  PhoenixMiner.exe -pool proxy.pool.whalesburg.com:8082 -wal YourEthWalletAddress -worker WorkerName -proto 2
dwarfpool.com

(EXP):
  PhoenixMiner.exe -pool exp-eu.dwarfpool.com:8018 -wal YourExpWalletAddress/WorkerName
miningpoolhub

(MUSIC):
  PhoenixMiner.exe -pool europe.ethash-hub.miningpoolhub.com:20585 -wal YourLoginName.WorkerName -pass x -proto 1
maxhash.org

(UBIQ):
  PhoenixMiner.exe -pool ubiq-us.maxhash.org:10008 -wal YourUbqWalletAddress -worker WorkerName -coin ubq
ubiq.minerpool.net

(UBIQ):
  PhoenixMiner.exe -pool lb.geo.ubiqpool.org:8001 -wal YourUbqWalletAddress -pass x -worker WorkerName -coin ubq
ubiqpool.io

(UBIQ):
  PhoenixMiner.exe -pool eu2.ubiqpool.io:8008 -wal YourUbqWalletAddress.WorkerName -pass x -proto 4 -coin ubq
minerpool.net

(PIRL):
  PhoenixMiner.exe -pool pirl.minerpool.net:8002 -wal YourPirlWalletAddress -pass x -worker WorkerName
dodopool.com

(Metaverse ETP):
  PhoenixMiner.exe -pool etp.dodopool.com:8008 -wal YourMetaverseETPWalletAddress -worker Rig1 -pass x
minerpool.net

(Ellaism):
  PhoenixMiner.exe -pool ella.minerpool.net:8002 -wal YourEllaismWalletAddress -worker Rig1 -pass x
etherdig.net

(ETH PPS):
  PhoenixMiner.exe -pool etherdig.net:4444 -wal YourEthWalletAddress.WorkerName -proto 4 -pass x
etherdig.net

(ETH HVPPS):
  PhoenixMiner.exe -pool etherdig.net:3333 -wal YourEthWalletAddress.WorkerName -proto 4 -pass x
epool.io

(CLO):
  PhoenixMiner.exe -pool eu.clo.epool.io:8008 -pool2 us.clo.epool.io:8008 -worker WorkerName -wal YourEthWalletAddress -pass x -coin clo -retrydelay 2
baikalmine.com

(CLO):
  PhoenixMiner.exe -pool clo.baikalmine.com:3333 -wal YourEthWalletAddress -pass x -coin clo -worker rigName
Dual-mining command-line examples:
ETH on ethermine.org ETH, Blake2s on Nicehash:
  PhoenixMiner.exe -pool ssl://eu1.ethermine.org:5555 -pool2 ssl://us1.ethermine.org:5555 -wal YourEthWalletAddress.WorkerName -proto 3 -dpool blake2s.eu.nicehash.com:3361 -dwal YourBtcWalletAddress -dcoin blake2s

Nicehash (Ethash + Blake2s):
  PhoenixMiner.exe -pool stratum+tcp://daggerhashimoto.eu.nicehash.com:3353 -wal YourBtcWalletAddress -pass x -proto 4 -stales 0 -dpool blake2s.eu.nicehash.com:3361 -dwal YourBtcWalletAddress -dcoin blake2s
ProgPOW command-line examples:
BCI on BCI-Server:
  PhoenixMiner.exe -pool eu-1.pool.bci-server.com:3869 -wal YourBciWalletAddress.Rig1 -coin bci -proto 1
2. Особенности, требования и ограничения
* Поддерживает AMD RX5700, Radeon VII, Vega, 580/570/480/470, 460/560, Fury, 390/290 и более старые графические процессоры AMD с достаточным количеством VRAM
* Поддерживает Nvidia 20×0, 16×0, 10×0 и 9×0, а также более старые карты с достаточным объемом VRAM
* Высоко оптимизированные ядра OpenCL и CUDA для максимальной скорости добычи ethash
* Дополнительные “зеленые” ядра для RX580/570/560/480/470/460 позволяют снизить энергопотребление на 2-3% при небольшом или нулевом падении хэшрейта
* Самая низкая комиссия разработчика 0. 65% (35 секунд дефайна на каждые 90 минут)
* Двойной майнинг ethash/Blake2s с наименьшим devfee 0.9% (35 секунд дефайна на каждые 65 минут)
* Расширенная статистика: фактическая сложность каждой доли, эффективный хешрейт в пуле, и опциональное отображение предполагаемого дохода в USD
* Генерация DAG файлов в GPU для более быстрого запуска и переключения эпох DAG
* Поддерживает все пулы для майнинга ethash и стратовые протоколы
* Поддерживает безопасные соединения с пулами (например, ssl. например, ssl://eu1.ethermine.org:5555) для предотвращения атак перехвата IP-адресов
* Подробная статистика, включая хэшрейт отдельных карт, доли, температуру, скорость вентиляторов, часы, напряжения и т.д.
* Неограниченное количество отказоустойчивых пулов в epools. txt конфигурационном файле (или двух в командной строке)
* Автоматическая настройка GPU для графических процессоров AMD для достижения максимальной производительности вашей установки
* Поддержка devfee на альтернативных валютах ethash, таких как ETC, EXP, Music, UBQ, Pirl, Ellaism, Metaverse ETP, PGC, Akroma, WhaleCoin, Victorium, Nekonium, Mix, EtherGem, Aura, HBC, Genom, EtherZero, Callisto, DubaiCoin, MOAC, Ether-1 и EtherCC. Это позволяет использовать старые карты с небольшим объемом VRAM или низким хэшрейтом на текущих эпохах DAG (например, GTX970).
* Полная совместимость с промышленным стандартом Claymore’s Dual Ethereum miner, включая большинство опций командной строки, конфигурационные файлы, а также удаленный мониторинг и управление.
* Поддержка нового алгоритма Ubqhash для монеты UBQ. Обратите внимание, что для добычи UBQ необходимо добавить -coin ubq в командную строку (или COIN: ubq в файл epools.txt)
* Поддерживает алгоритм ProgPOW для добычи монеты Bitcoin Interest (BCI). Обратите внимание, что вы должны добавить -coin bci в командную строку (или COIN: bci в файл epools.txt), чтобы майнить BCI
* Поддерживает алгоритм ProgPOW для майнинга BCI.
* Другие функции скоро появятся!
PhoenixMiner требуется Windows x64 (Windows 7, Windows 10 и т.д.), или Linux x64 (проверено на Ubuntu LTS
и Debian stable). PhoenixMiner также поддерживает двойной майнинг (одновременный майнинг ethash/ubqhash и другого алгоритма криптомонет). В настоящее время мы поддерживаем только Blake2s в качестве вторичного алгоритма для двойного майнинга. Обратите внимание, что при использовании двойного майнинга devfee на вторичную монету отсутствует, но devfee на основную монету увеличивается до 0,9%. Другими словами, при использовании функции двойной добычи PhoenixMiner будет добывать для нас 35 секунд каждые 65 минут.
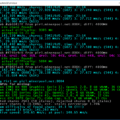
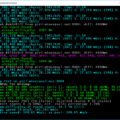
Соло-майнинг поддерживается начиная с версии 2.7c. Во время работы майнера вы можете использовать некоторые интерактивные команды. Нажмите клавишу ‘h’, когда окно консоли майнера находится в фокусе клавиатуры, чтобы увидеть список доступных команд. На сайте
интерактивные команды также перечислены в конце следующего раздела.
3. Command-line arguments
Обратите внимание, что PhoenixMiner поддерживает большинство опций командной строки двойного майнера Ethereum от Claymore.
поэтому вы можете использовать те же опции командной строки, что и в майнере Claymore.
Pool options:
  -pool <host:port> Ethash pool address (prepend the host name with ssl:// for SSL pool, or http:// for solo mining)
  -wal <wallet> Ethash wallet (some pools require appending of user name and/or worker)
  -pass <password> Ethash password (most pools don't require it, use 'x' as password if unsure)
  -worker <name> Ethash worker name (most pools accept it as part of wallet)
  -proto <n> Selects the kind of stratum protocol for the ethash pool:
     1: miner-proxy stratum spec (e.g. coinotron)
     2: eth-proxy (e.g. dwarfpool, nanopool) - this is the default, works for most pools
     3: qtminer (e.g. ethpool)
     4: EthereumStratum/1.0.0 (e.g. nicehash)
     5: EthereumStratum/2.0.0
  -coin <coin> Ethash coin to use for devfee to avoid switching DAGs:
     auto: Try to determine from the pool address (default)
     eth: Ethereum
     etc: Ethereum Classic
     exp: Expanse
     music: Musicoin
     ubq: UBIQ
     pirl: Pirl
     ella: Ellaism
     etp: Metaverse ETP
     whale: WhaleCoin
     vic: Victorium
     nuko: Nekonium
     mix: Mix
     egem: EtherGem
     etz: EtherZero
     clo: Callisto
     dbix: DubaiCoin
     moac: MOAC
     etho: Ether-1
     yoc: Yocoin
     b2g: Bitcoiin2Gen
     esn: Ethersocial
     ath: Atheios
     reosc: REOSC
     qkc: QuarkChain
     bci: Bitcoin Interest
  -stales <n> Submit stales to ethash pool: 1 - yes (default), 0 - no
  -pool2 <host:port>  Failover ethash pool address. Same as -pool but for the failover pool
  -wal2 <wallet> Failover ethash wallet (if missing -wal will be used for the failover pool too)
  -pass2 <password> Failover ethash password (if missing -pass will be used for the failover pool too)
  -worker2 <name> Failover ethash worker name (if missing -worker will be used for the failover pool too)
  -proto2 <n> Failover ethash stratum protocol (if missing -proto will be used for the failover pool too)
  -coin2 <coin> Failover devfee Ethash coin (if missing -coin will be used for the failover pool too)
  -stales2 <n> Submit stales to the failover pool: 1 - yes (default), 0 - no
  -dpool <host:port> Dual mining pool address
  -dwal <wallet> Dual mining wallet
  -dpass <password> Dual mining pool password (most pools don't require it, use 'x' as password if unsure)
  -dworker <name> Dual mining worker name
  -dcoin blake2s Currently only the Blake2s algorithm is supported for dual mining. If you want to put
        all dual mining pools in dpools.txt, you need to set -dcoin blake2s in the command-line or in config.txt
   to force the miner to load the dual mining pools from dpools.txt
  -dstales <n> Submit stales to the dual mining pool: 1 - yes (default), 0 - no
General pool options:
  -fret <n> Switch to next pool afer N failed connection attempts (default: 3)
  -ftimeout <n> Reconnect if no new ethash job is receved for n seconds (default: 600)
  -ptimeout <n> Switch back to primary pool after n minutes. This setting is 30 minutes by default;
     set to 0 to disable automatic switch back to primary pool.
  -retrydelay <n> Seconds to wait before reconnecting (default: 20)
  -gwtime <n> Recheck period for Solo/GetWork mining (default: 200 ms)
  -rate <n> Report hashrate to the pool: 1 - yes, 0 - no (1 is the default), 2 - (for solo mining only)
     use alternative name of the report method "eth_submitHashRate" instead of "eth_submitHashrate"
Benchmark mode:
  -bench [<n>],-benchmark [<n>] Benchmark mode, optionally specify DAG epoch. Use this to test your rig.
     If you specify only the -bench option, you will benchmark the ethash algorithm. If you want to bench
     the dual mining, use the options -bench <n> -dcoin blake2s. If you want to benchmark the ProgPOW BCI
     algorithm, use the options -bench <n> -coin bci
Remote control options:
  -cdm <n> Selects the level of support of the CDM remote monitoring:
     0: disabled
     1: read-only - this is the default
     2: full (only use on secure connections)
  -cdmport <port> Set the CDM remote monitoring port (default is 3333). You can also specify
     <ip_addr:port> if you have a secure VPN connection and want to bind the CDM port to it
  -cdmpass <pass> Set the CDM remote monitoring password
  -cdmrs Reload the settings if config.txt is edited/uploaded remotely. Note that most options require restart in order to change.
      Currently the follwing options can be changed without restarting: -mi, -gt, -sci, -clf, -nvf, -gpow, and most of the
      hardware control parameters (-tt, -fcm, -fanmin, -fanmax, -powlim, -tmax, -ttli, -cclock, -cvddc, -mclock,
      -mvddc, -ppf, -straps, -vmt1, -vmt2, -vmt3, -vmr)
Mining options:
  -amd  Use only AMD cards
  -acm  Turn on AMD compute mode on the supported GPUs. This is equivalent of pressing 'y' in the miner console.
  -nvidia  Use only Nvidia cards
  -gpus <123 ..n> Use only the specified GPUs (if more than 10, separate the indexes with comma)
  -mi <n> Set the mining intensity (0 to 14; 12 is the default for the new kernels). You may specify this option per-GPU.
  -gt <n> Set the GPU tuning parameter (6 to 400). The default is 15. You can change the
          tuning parameter interactively with the '+' and '-' keys in the miner's console window.
          If you don't specify -gt or you specify value 0, the miner will start auto-tuning to determine the best GT value for each GPU
          Note that when the GPU is dual-mining, it ignores the -gt values, and uses -sci instead.
  -sci <n> Set the dual mining intensity (1 to 1000). The default is 30. As you increase the value of -sci,
           the secondary coin hashrate will increase but the price will be higher power consumption and/or
           lower ethash hashrate.
           You can change the this parameter interactively with the '+' and '-' keys in the miner
           console window. You may specify this option per-GPU. If you set -sci to 0,
      the miner will use auto-tuning to determine the best value, while trying to maximize the
      ethash hashrate regardless of the secondary coin hashrate.
  -clKernel <n> Type of OpenCL kernel: 0 - generic, 1 - optimized, 2 - alternative, 3 - turbo (1 is the default)
  -clGreen <n> Use the power-efficient ("green") kernels (0: no, 1: yes; default: 0).
                 You may specify this option per-GPU. Note that you have to run auto-tune again as the
                 optimal GT values are completely different for the green kernels
  -clNew <n> Use the new AMD kernels (0: no, 1: yes; default: 1)
  -clf <n> AMD kernel sync (0: never, 1: periodic; 2: always; default: 1)
  -nvKernel <n> Type of Nvidia kernel: 0 auto (default), 1 old (v1), 2 newer (v2), 3 latest (v3).
                Note that v3 kernels are only supported on GTX10x0 GPUs. Also note that dual mining is
                supported only by v2 kernels. You may specify this option per-GPU.
  -nvdo <n> Enable Nvidia driver-specific optimizations (0 - no, the default; 1 - yes). Try -nvdo 1 if your
            are unstable. You may specify this option per-GPU.
  -nvNew <n> Use new Nvidia kernels if supported (0: no, 1: yes; default: 1)
  -nvf <n> Nvidia kernel sync (0: never, 1: periodic; 2: always; 3: forced; default: 1). You may specify this option per-GPU.
  -mode <n> Mining mode (0: dual mining if dual pool(s) are specified; 1: ethash only even if dual pools are specified).
            You may specify this option per-GPU.
  -list List the detected GPUs devices and exit
  -gbase <n> Set the index of the first GPU (0 or 1, default: 1)
  -minRigSpeed <n> Restart the miner if avg 5 min speed is below <n> MH/s
  -eres <n> Allocate DAG buffers big enough for n epochs ahead (default: 2) to
      avoid allocating new buffers on each DAG epoch switch, which should improve DAG switch stability
  -dagrestart <n> Restart the miner when allocating buffer for a new DAG epoch. The
      possible values are: 0 - never, 1 - always, 2 - auto (the miner decides depending on the driver version).
      This is relevant for 4 GB AMD cards, which may have problems with new DAG epochs after epoch 350.
  -lidag <n> Slow down DAG generation to avoid crashes when swiching DAG epochs
      (0-3, default: 0 - fastest, 3 - slowest).
  -gser <n> Serializing DAG creation on multiple GPUs (0 - no serializing, all GPUs generate the DAG simultaneously, this is the default;
      1 - partial overlap of DAG generation on each GPU; 2 - no overalp (each GPU waits until the previous one has finished generating the DAG);
      3-10 - from 1 to 8 seconds delay after each GPU DAG generation before the next one)
  -gpureset <n> Fully reset GPU when paused (0 - no, 1 - yes; default: no, except on 1080Ti). You may specify this option per-GPU.
  -altinit Use alternative way to initialize AMD cards to prevent startup crashes
  -rvram <n> Minimum free VRAM in MB (-1: don't check; default: 384 for Windows, and 128 for Linux)
  -wdog <n> Enable watchdog timer: 1 - yes, 0 - no (1 is the default). The watchdog timer checks
      periodically if any of the GPUs freezes and if it does, restarts the miner (see the -rmode
      command-line parameter for the restart modes)
  -wdtimeout <n> Watchdog timeout (30 - 300; default 45 seconds). You can use this parameter to increase
      the default watchdog timeout in case it restarts the miner needlessly
  -rmode <n> Selects the restart mode when a GPU crashes or freezes:
     0: disabled - miner will shut down instead of restarting
     1: restart with the same command line options - this is the default
     2: reboot (shut down miner and execute reboot.bat)
  -log <n> Selects the log file mode:
     0: disabled - no log file will be written
     1: write log file but don't show debug messages on screen (default)
     2: write log file and show debug messages on screen
  -logfile <name> Set the name of the logfile. If you place an asterisk (*) in the logfile name, it will be
      replaced by the current date/time to create a unique name every time PhoenixMiner is started. If there
      is no asterisk in the logfile name, the new log entries will be added to end of the same file. If you
      want to use the same logfile but the contents to be overwritten every time when you start the miner,
      put a dollar sign ($) character in the logfile name (e.g. -logfile my_log.txt$).
  -logdir <path> Set a path where the logfile(s) will be created
  -logsmaxsize <n> Maximum size of the logfiles in MB. The default is 200 MB (use 0 to turn off the limitation).
      On startup, if the logfiles are larger than the specified limit, the oldest are deleted. If you use a
      single logfile (by using -logfile), then it is truncated if it is bigger than the limit and a new one
      is created.
  -config <name> Load a file with configuration options that will be added to the command-line options.
      Note that the order is important. For example, if we have a config.txt file that contains -cclock 1000
      and we specify command line -cclock 1100 -config config.txt, the options from the config.txt file will take
      precedence and the resulting -cclock will be 1000. If the order is reversed (-config config.txt -cclock 1100)
      then the second option takes precedence and the resulting -cclock will be 1100. Note that only one -config
      option is allowed. Also note that if you reload the config file with 'c' key or with the remote interface,
      its options will take precedence over whatever you have specified in the command-line.
  -timeout <n> Restart miner according to -rmode after n minutes
  -pauseat <hh:mm> Pause the miner at hh::mm (24 hours time). You can specify multiple times: -pauseat 6:00,12:00
  -resumeat <hh:mm> Resume the miner at hh::mm (24 hours time). You can specify multiple times: -resumeat 8:00,22:00
  -gswin <n> GPU stats time window (5-30 sec; default: 15; use 0 to revert to pre-2.8 way of showing momentary stats)
  -gsi <n> Speed stats interval (5-30 sec; default: 5; use 0 to disable). The detailed stats are still
           shown every 45 seconds and aren't affected by the -gsi value
  -astats <n> Show advanced stats from Web sources (0: no; 1: yes). By default the coin exchange rates are updated every
              4 hours, and the coin difficulty is updated every 8 hours. You can increase these periods by specifying
              for example -astats 12, which will increase update periods to 12 and 24 hours respectively
  -gpow <n> Lower the GPU usage to n% of maximum (default: 100). If you already use -mi 0 (or other low value) use -li instead
  -li <n> Another way to lower the GPU usage. Bigger n values mean less GPU utilization; the default is 0.
  -resetoc Reset the hardware overclocking settings on startup
  -leaveoc Do not reset overclocking settings when closing the miner
Hardware control options, use comma to specify different values for each GPU:
  -tt <n> Set fan control target temperature (special values: 0 - no HW monitoring on ALL cards,
     1-4 - only monitoring on all cards with 30-120 seconds interval, negative - fixed fan speed at n %)
  -hstats <n> Level of hardware monitoring: 0 - temperature and fan speed only; 1 - temperature, fan speed, and power;
     2 - full (include core/memory clocks, voltages, P-states). The default is 1.
  -pidle <n> Idle power consumption of the rig in W. Will be added to the GPU power consumption when
     calculating the total power consumption of the rig.
  -ppf <n> The power usage of each GPU will be multiplied by this value to get the actual usage. This value is
     in percent, so for example if the GPU reports 100 W power usage and you have specified -ppf 106 the GPU
     power usage will be calculated to be 100 * (106 / 100) = 106 W. This allows you to correct for the efficiency
     of the PSUs and the individual GPUs. You can also specify this value for each GPU separately.
  -prate <n> Price of the electricity in USD per kWh (e.g. -prate 0.1). If specified the miner will calculate the
     rig daily electricity cost
  -fanmin <n> Set fan control min speed in % (-1 for default)
  -fanmax <n> Set fan control max speed in % (-1 for default)
  -fcm <n> Set fan control mode (0 - auto, 1 - use VBIOS fan control, 2 - forced fan control; default: 0)
  -tmax <n> Set fan control max temperature (0 for default)
  -powlim <n> Set GPU power limit in % (from -75 to 75, 0 for default)
  -cclock <n> Set GPU core clock in MHz (0 for default). For Nvidia cards use relative values (e.g. -300 or +400)
  -cvddc <n> Set GPU core voltage in mV (0 for default). For Nvidia cards use relative values (e.g. -300 or +400)
  -mclock <n> Set GPU memory clock in MHz (0 for default)
  -mvddc <n> Set GPU memory voltage in mV (0 for default)
  -tstop <n> Pause a GPU when temp is >= n deg C (0 for default; i.e. off)
  -tstart <n> Resume a GPU when temp is <= n deg C (0 for default; i.e. off)
  -mt <n> VRAM timings (AMD under Windows only): 0 - default VBIOS values; 1 - faster timings; 2 - fastest timings.
     The default is 0. This is useful for mining with AMD cards without modding the VBIOS. If you have modded BIOS,
     it is probably faster than even -mt 2
  -leavemt  Do not reset memory timing level ("-mt") to 0 when closing
  -ttli <n>   Lower GPU usage when GPU temperature is above n deg C. The default value is 0, which means do not lower the usage regardless of the
     GPU temperature. This option is useful whenever -tmax is not working. If you are using both -tt and -ttli options, the
     temperature in -tt should be lower than the -ttli to avoid throttling the GPUs without using the fans to properly cool them first.
  -straps <n> Memory strap level (Nvidia cards 10x0 series only). The possible values are 0 to 6. 0 is the default value and uses the default
     timings from the VBIOS. Each strap level corresponds to a predefined combination of memory timings (-vmt1, -vmt2,
     -vmt3, -vmr). Strap level 3 is the fastest predefined level and may not work on most cards, 1 is the slowest (but still faster than
     the default timings). Strap levels 4 to 6 are the same as 1 to 3 but with less aggressive refresh rates (i.e. lower "-vmr" values).
  -vmt1 <n>  Memory timing parameter 1 (0 to 100, default 0)
  -vmt2 <n>  Memory timing parameter 2 (0 to 100, default 0)
  -vmt3 <n>  Memory timing parameter 3 (0 to 100, default 0)
  -vmr <n>   Memory refresh rate (0 to 100, default 0)
  -nvmem <n>  Force using straps on unsupported Nvidia GPUs (0 - do not force, 1 - GDDR5, 2 - GDDR5X). Make sure that the parameter matches your GPU
     memory type. You can try this if your card is Pascal-based but when you try to use -straps or any other memory timing option, the card
     is shown as "unsupported".
General Options:
  -v,--version  Show the version and exit
  -vs Show short version string (e.g. "4.1c") and exit
  -h,--help  Show information about the command-line options and exit
Per-GPU options
Some of the PhoenixMiner options can provide either the same setting for all GPUs, or a different
setting for each of the GPUs. For example, to specify the -gt value for all cards you would write
-gt 90 but if you want to specify a different GT value for each of the cards, use something like this:
-gt 20,15,40,90,90 for a five-GPU mining rig. This would set GT to 20 for the first GPU, 15 for the second
GPU, and so on. If you specify less values than you have GPUs, the rest of the GPUs will use the default
value for the parameter.
You can also use another, more flexible way of specifying different values for the different cards.
This is best explained by example: -cclock *:1100,1-3:1090,4:1300 – here we are setting core clock
to 1100 MHz for all cards, except the cards 1 to 3, on which it is set to 1090 MHz, and card 4 to 1300 MHz.
The part before the colon (:) is the selector, which selects the GPUs for which the value after the colon is applied. The selector can be:
– single GPU index: e.g. 5:1000 sets 1000 for the 5th GPU
– range of GPU indexes: e.g 2-5:1200 sets 1200 for the GPUs 2,3,4, and 5
– asterisk, which sets the value for all GPUs
– label amd or nvidia: e.g. amd:1090 sets the value to 1090 for all AMD cards
– arbitrary string that starts with letter and can contain letters, numbers and asterisks,
which is matched with the GPU name as listed by PhoenixMiner. Example: gtx*1070:+500 will
set value +500 for all cards which contain ‘gtx’ and ‘1070’ in their names with anything
between them. This will match ‘Nvidia GeForce GTX 1070’ but not ‘Nvidia GeForce 1070’.
Note that if more than one selector matches given card, than only the last one counts.
Example: -cclock *:1100,1-4:1090,2:1300 will set card 2 to 1300; cards 1,2, and 4 to 1090;
and the rest of the cards to 1100 MHz core clock.
Additionally, while the miner is running, you can use the following interactive commands
in the console window by pressing one of these keys:
s Print detailed statistics
1-9 Pause/resume GPU1 … GPU9 (if you have more than 9 GPUs, type 010 for card 10, 011 for card 11, etc.)
p Pause/resume the whole miner
+,- Increase/decrease GPU tuning parameter
g Reset the GPU tuning parameter (and stop auto-tuning if active)
x Select the GPU(s) for manual or automatic GT tuning
z Start AMD auto-tune process
r Reload epools.txt and switch to primary ethash pool
e Select the current ethash pool (if you have more than 9 pools in the list, type 010 for pool 10, 011 for pool 11, etc.)
d Select the current dual-mining pool
y Turn on AMD Compute mode if it is off on some of the GPUs
c Reload the config.txt file (some settings require restart, see -cdmrs option above for details)
h Print this short help
4. Configuration files
Note that PhoenixMiner supports the same configuration files as Claymore’s dual Ethereum miner
so you can use your existing configuration files without any changes.
Instead of using command-line options, you can also control PhoenixMiner with configuration
files. If you run PhoenixMiner.exe without any options, it will search for the file config.txt
in the current directory and will read its command-line options from it. If you want, you can
use file with another name by specifying its name as the only command-line option
when running PhoenixMiner.exe.
You will find an example config.txt file in the PhoenixMiner’s directory.
Instead of specifying the pool(s) directly on the command line, you can use another configuration
file for this, named epools.txt. There you can specify one pool per line (you will find an example
epools.txt file in the PhoenixMiner’s directory).
For the dual mining pools, you can use the dpools.txt file, which has the same format as epools.txt
but for the secondary coin. You will find an example epools.txt file in the PhoenixMiner’s directory.
Note that unlike the epools.txt, which is loaded each time when the miner starts, the dpools.txt file
is only read if you specify a dual mining pool on the command line with -dpool, or at least add
the -dcoin blake2s command-line option.
The advantages of using config.txt and epools.txt/dpools.txt files are:
– If you have multiple rigs, you can copy and paste all settings with these files
– If you control your rigs via remote control, you can change pools and even the miner options by
uploading new epools.txt files to the miner, or by uploading new config.txt file and restarting
the miner.
5. Remote monitoring and management
Phoenix miner is fully compatible with Claymore’s dual miner protocol for remote monitoring and
management. This means that you can use any tools that are build to support Claymore’s dual miner,
including the “Remote manager” application that is part of Claymore’s dual miner package.
We are working on much more powerful and secure remote monitoring and control functionality and
control center application, which will allow better control over your remote or local rigs and some
unique features to increase your mining profits.
6. Hardware control options
Here are some important notes about the hardware control options:
- Most recent Nvidia drivers require running as administrator (or as root under Linux) to allow hardware control, so you must run
PhoenixMiner as administrator for the VRAM timing options to work. - When using the VRAM timing options (“-straps”, “-vmt1”, “-vmt2”, “-vmt3”, “-vmr”), start with lower values and make sure that the
cards are stable before trying higher and more aggressive settings. You can use “-straps” along with the other options. For example
“-straps 1” “-vmt1 60” will use the timings from 1st strap level but -vmt1 will be set to 60 instead of whatever value is specified by
the 1st strap level. In such case the “-straps” option must be specified first. - Generally, the “-vmt3” option has little effect on the hashrate, so first try adjusting the other parameters.
- The VRAM timing options can be quite different between the GPUs, even when the GPUs are the same model. Therefore, you can (and
probably should) specify the VRAM timing options per-GPU. - Hardware control options are supported for both AMD and Nvidia cards under Windows. Under Linux most options are supported only for AMD cards.
- If you specify a single value (e.g. -cvddc 1150), it will be used on all cards. Specify different values for each card like this (separate with comma): -cvddc 1100,1100,1150,1120,1090 If the specified values are less than the number of GPUs, the rest of GPUs will use the default values.
- We have tested only on relatively recent AMD GPUs (RX460/470/480/560/570/580, Vega, Radeon VII, RX5700). Your results may vary with older GPUs.
- The blockchain beta drivers from AMD show quite unstable results – often the voltages don’t stick at all or revert back to the default after some time. For best results use the newer drivers from AMD: 18.5.1 or later, where most of the bugs are fixed.
- -tmax specifies the temperature at which the GPU should start to throttle (because the fans can’t keep up).
- If you use other programs for hardware control, conflicts are possible and quite likely. Use something like GPU-Z to monitor the voltages, etc. MSI Afterburner also seems to behave OK (so you can use it to control the Nvidia cards while AMD cards are controller by PhoenixMiner).
- This should be obvious but still: if given clocks/voltages are causing crashes/freezes/incorrect shares when set with third-party program, they will be just as much unstable when set via PhoenixMiner hardware control options.
- If you have problems with hardware control options of PhoenixMiner and you were using something else to control clocks, fans, and voltages (MSI Aftrerburner, OverdriveNTool, etc.), which you were happy with, it is probably best to keep using it and ignore the hardware control options of PhoenixMiner (or use only some of them and continue tweaking the rest with your third-party tools).
7. FAQ
Q001: Why another miner?
A: We feel that the competition is good for the end user. In the first releases of PhoenixMiner
we focused on the basic features and on the mining speed but we are now working on making our
miner easier to use and even faster.
Q002: Can I run several instances of PhoenixMiner on the same rig?
A: Yes, but make sure that each GPU is used by a single miner (use the -gpus, -amd, or -nvidia
command-line options to limit the GPUs that given instance of PhoenixMiner actually uses).
Another possible problem is that all instances will use the default CDM remote port 3333,
which will prevent proper remote control for all but the first instance. To fix this problem,
use the -cdmport command-line option to change the CDM remote port form its default value.
Q003: Can I run PhoenixMiner simultaneously on the same rig with other miners?
A: Yes, but see the answer to the previous question for how to avoid problems.
Q004: What is a stale share?
A: The ethash coins usually have very small average block time (15 seconds in most instances).
On the other hand, to achieve high mining speed we must keep the GPUs busy so we can’t switch
the current job too often. If our rigs finds a share just after the someone else has found a
solution for the current block, our share is a stale share. Ideally, the stale shares should be
minimal as same pools do not give any reward for stale shares, and even these that do reward
stale shares, give only partial reward for these shares. If the share is submitted too long
after the block has ended, the pool may even fully reject it.
Q005: Why is the percentage of stale shares reported by PhoenixMiner smaller than the one shown
by the pool?
A: PhoenixMiner can only detect the stale shares that were discovered after it has received a
new job (i.e. the “very stale”) shares. There is additional latency in the pool itself, and in
the network connection, which makes a share stale even if it was technically found before the
end of the block from the miner’s point of view. As pools only reports the shares as accepted
or rejected, there is no way for the miner to determine the stale shares from the pool’s
point of view.
Q006: What is the meaning of the “actual share difficulty” shown by PhoenixMiner when a share is
found?
A: It allows you to see how close you were to finding an actual block (a rare event these days
for the most miners with reasonable-sized mining rigs). You can find the current difficulty for
given coin on sites like whattomine.com and then check to see if you have exceeded it with your
maximum share difficulty. If you did, you have found a block (which is what the mining is all
about).
Q007: What is the meaning of “effective speed” shown by PhoenixMiner’s statistics?
A: This is a measure of the actually found shares, which determines how the pool sees your
miner hashrate. This number should be close to the average hashrate of your rig (usually a 2-4%
lower than it) depending you your current luck in finding shares. This statistic is meaningless
in the first few hours after the miner is started and will level off to the real value with
time.
Q008: Why is the effective hashrate shown by the pool lower than the one shown by PhoenixMiner?
A: There are two reasons for this: stale shares and luck. The stale shares are rewarded at only
about 50-70% by most pools. The luck factor should level itself off over time but it may take
a few days before it does. If your effective hashrate reported by the pool is consistently lower
than the hashrate of your rig by more than 5-7% than you should look at the number of stale shares
and the average share acceptance time – if it is higher than 100 ms, try to find a pool that is
near to you geographically to lower the network latency. You can also restart your rig, or
try another pool.
8. Troubleshooting
P001: I’m using AMD RX470/480/570/580 or similar card and my hashrate dropped significantly in the past
few months for Ethereum and Ethereum classic!
S: This is known problem with some cards. For the newer cards (RX470/480/570/580), this can be
solved by using the special blockchain driver from AMD (or try the latest drivers, they may
incorporate the fix). For the older cards there is no workaround but you still can mine EXP,
Musicoin, UBQ or PIRL with the same speed that you mined ETH before the drop.
P002: My Nvidia GTX9x0 card is showing very low hashrate under Windows 10!
S: While there is a (convoluted) workaround, the best solution is to avoid Windows 10
for these cards – use Windows 7 instead.
P003: I’m using Nvidia GTX970 (or similar) card and my hashrate dropped dramatically for Ethereum or
Ethereum classic!
S: GTX970 has enough VRAM for larger DAGs but its hashate drops when the DAG size starts
to exceed 2 GB or so. Unlike the AMD Polaris-based cards, there is no workaround for this
problem. We recommend using these cards to mine EXP, Musicoin, UBQ or PIRL with the same speed
that you used to ETH before the drop.
P004: I can’t see some of my cards (or their fan speed and temperature) when using Windows Remote Desktop (RDP)!
S: This is a known problem with RDP. Use VNC or TeamViewer instead.
P005: On Windows 10, if you click inside the PhoenixMiner console, it freezes!
S: This is a known problem on Windows 10, related to so called “Quick Edit” feature of the command
prompt window. From PhoenixMiner 2.6, the QuickMode is disabled by default, so you shouldn’t experience
this problem. If you still, do, read here how to solve it:
P006: Immediately after starting, PhoenixMiner stops working and the last message is “debugger detected”
S: If you have only Nvidia cards, add the option -nvidia to the PhoenixMiner.exe command line.
If you have only AMD cards, add the option -amd to the command line.
P007: PhoenixMiner shows an error after allocating DAG buffer and shuts down.
S: If you have more than one GPU, make sure that your Windows page file minimal size is set to at
least (N x DS + 4) GB, where N is the number of GPUs, and DS is the size of DAG in GB (about 2.9 GB around
January 2019 for ETC and ETH). For example, if you have 10 GPUs, you need 10 x 2.9 + 4 = 33 GB minimal
size of the page file. Note that this will increase as the DAG sizes increase. If you are using -clkernel 3, for each GPU add size of
the DAG twice instead of once (e.g. for 3 GPUs mining with -clkenel 3 you will need 3 x 2 x 2.9 + 4 = 21.4 GB minimal page file size)
P008: The miner sometimes crashes when the DAG epoch change.
S: During DAG generation, the GPUs are loaded more than during the normal operation. If you have
overclocked or undervolted the GPUs “to the edge”, the DAG generation ofter pushes them “over the
edge”. Another possible reason for the crash (especially if the whole rig crashes) is the higher
power usage during this process. You can lower the DAG generation speed by specifying the -lidag
command-line option. The possible values are 0 (no slow down), 1, 2, and 3 (max slowdown).
In order to check if your rig would be stable during DAG generation, run it in benchmark mode
by specifying the -bench 210 command line option. Then every time when you press the key ‘d’
the miner will advance to the next DAG epoch, and you will be able to see if it is stable during
multiple DAG generations. If it isn’t you can try to alter the -lidag and -eres command line options
until the desired stability is achieved.
P009: The miner can’t create the DAG buffer when mining ETC or ETH
S: The versions of PhoenixMiner before 4.2 only support DAG epoch up to 265. Both ETC and ETH has reached epoch 266 already. To ensure uninterrupted operation, please upgrade to 4.2.
PhoenixMiner 4.2 supports DAG epoch up to 330, and PhoenixMiner 4.5 supports DAG epoch up to 450.